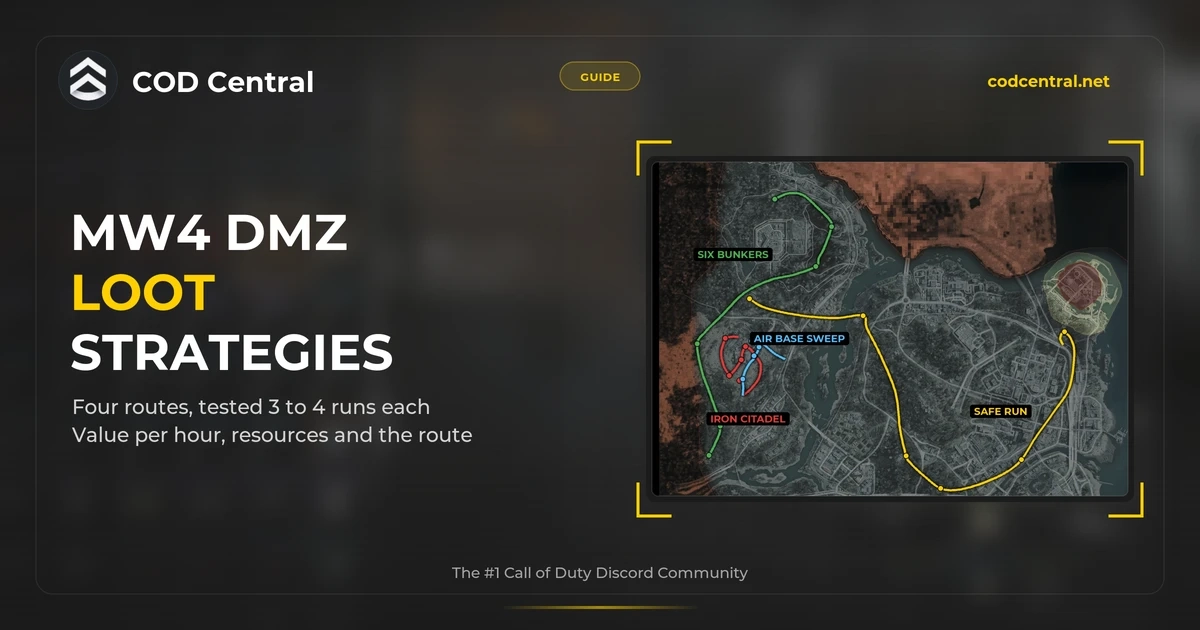
How do you make money fast in MW4 DMZ? It is the question we get most in our Discord, so we stopped guessing and started testing. We ran every loot strategy on Hajin several times, counted what we brought out and turned it into averages: value per hour, resources per hour and how long a run takes. Four strategies are done, and this guide grows as we test more.
- Best value per hour: the safe run. About $240,000 per hour, ten minutes per run, low risk, mostly valuables and cash.
- Easiest: the six bunkers. No loadout, one enemy per bunker, about $62,000 in 17 minutes.
- Best for resources: the air base sweep. About 1,470 resources per hour and a recipe most runs, but the base fights back.
- Biggest bag: Operation Iron Citadel. Over $100,000 per run plus Epic gear, but it is the hardest strategy here.
- Every strategy comes with a route card you can save, and every stop is also on our interactive Hajin map.
How We Test
We start every strategy with as little gear as it allows. Where you barely meet enemies, that means an empty loadout and a big backpack. Where a strategy sends you into a heavily guarded area, you need real gear to survive, so we bring a rifle, armor and a few heals, and subtract what that gear is worth from the result.
At the end of every run we count everything we brought out: the backpack value, the printer resources and the cash we banked. Each strategy gets at least three runs, and the numbers on the cards are the averages.
Value per hour is the average backpack value divided by the average run time, so a ten minute route and a forty minute route can be compared fairly.
Strategy 1: The Six Bunkers
This is the chill strategy. Six underground bunkers sit in the North Korean Wilderness on the west side of Hajin, and you work through them one by one: a bit of driving, a bit of looting, almost no fighting. Low effort, low difficulty, and anyone can do it.
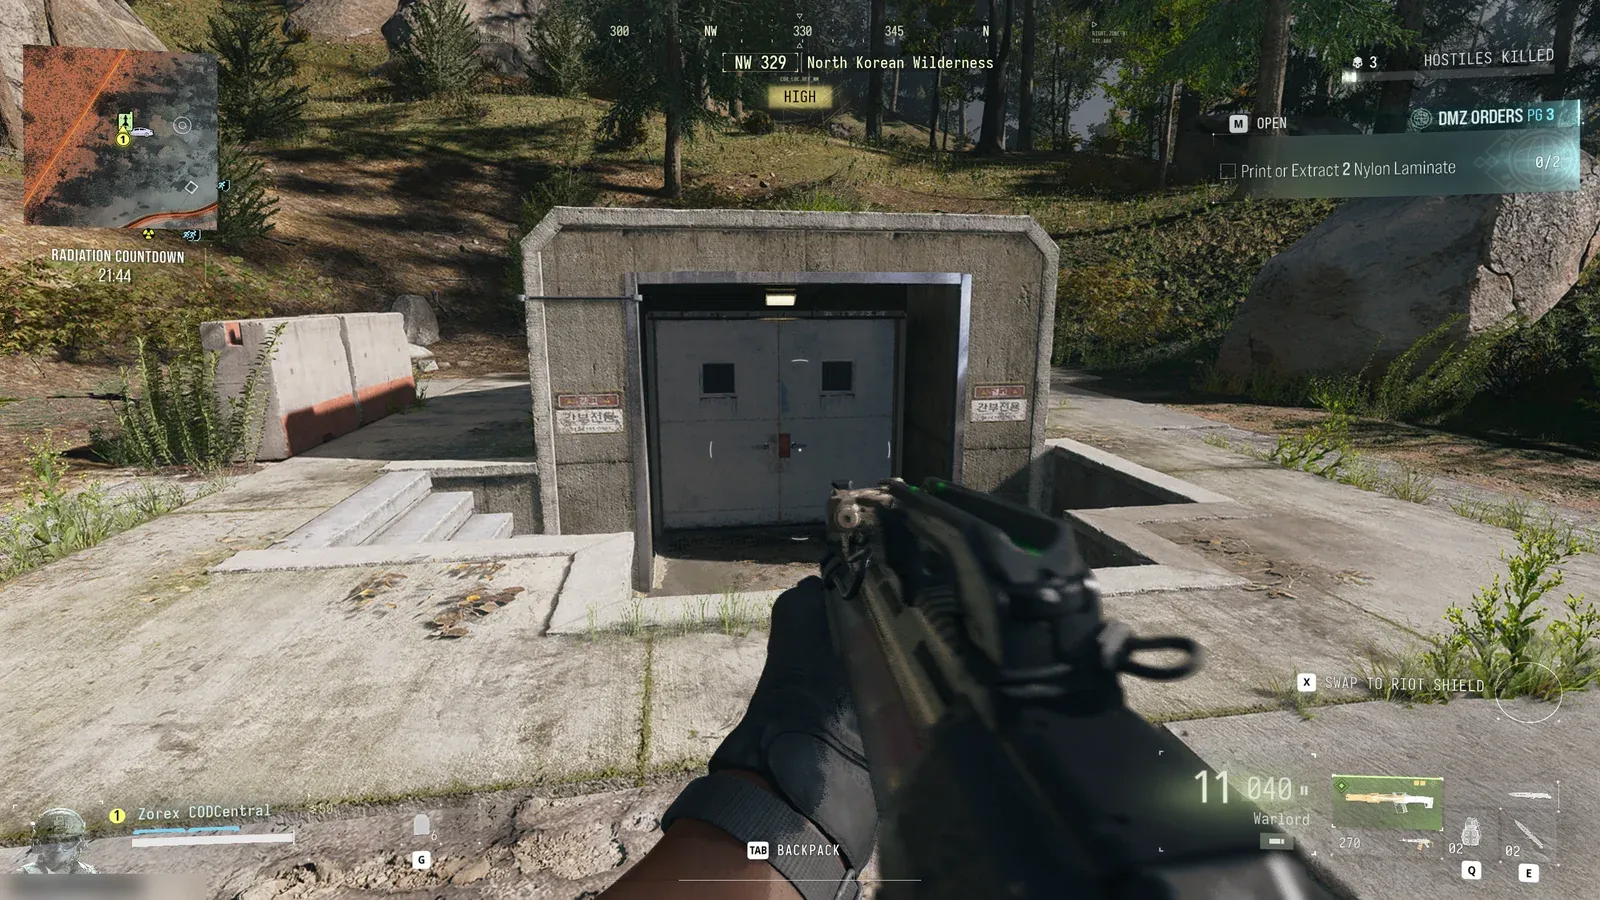
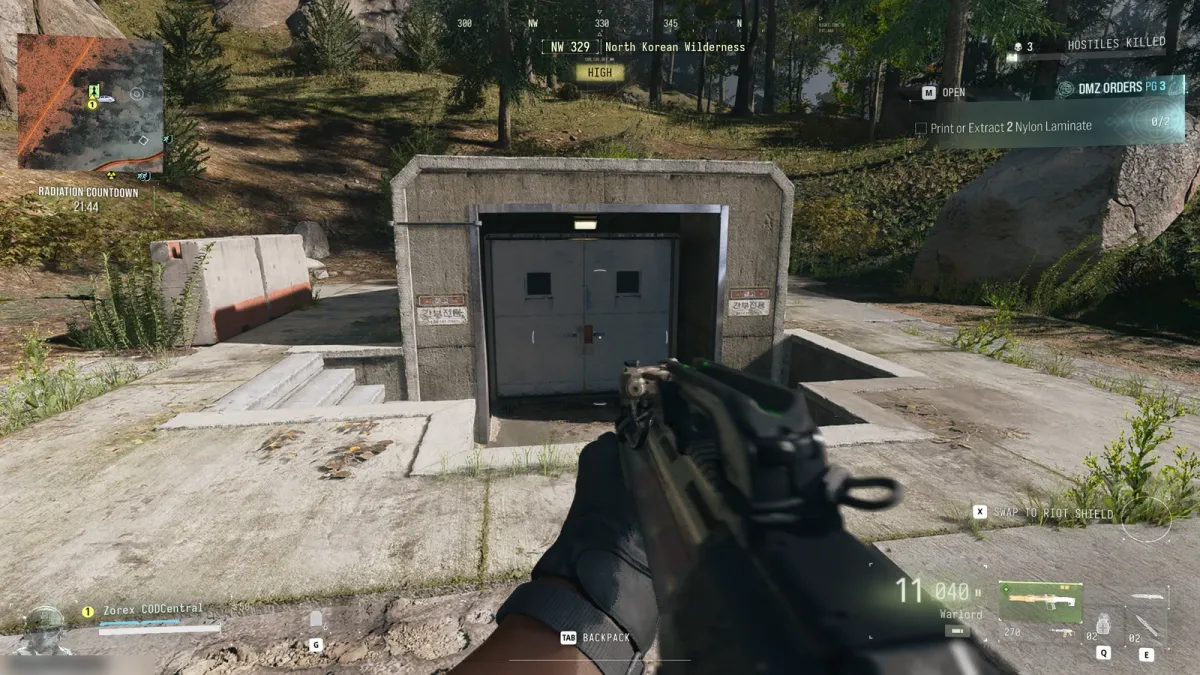 Click to enlarge A bunker entrance in the North Korean Wilderness. This front door stays locked, so walk around for the one you can open.
Start at whichever end is closest to your spawn: bunker 1 north-west of Hanrim Village from a northern spawn, or bunker 6 near the Re-Education Center from a southern one. If you spawn on the east side of the map, pick another strategy, because the trip alone eats too much of your time.
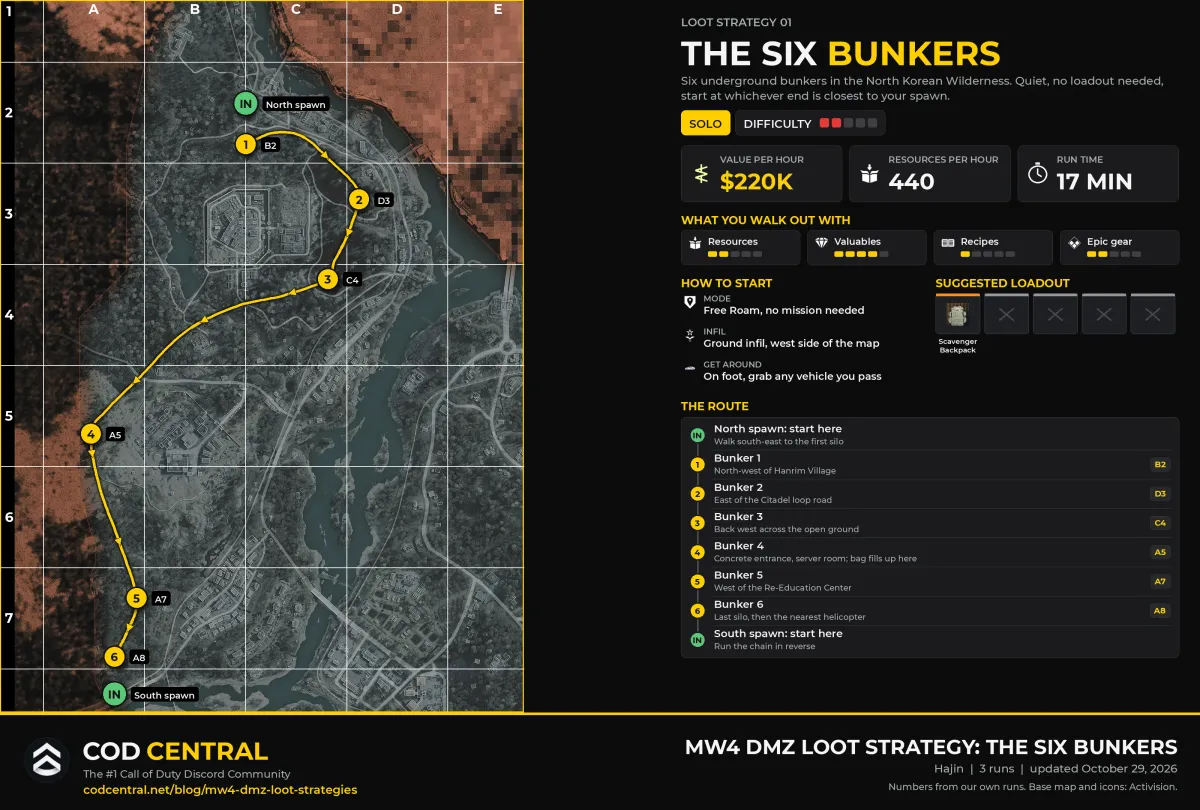 Click to enlarge The six bunkers. Start at whichever end is closest to your spawn.
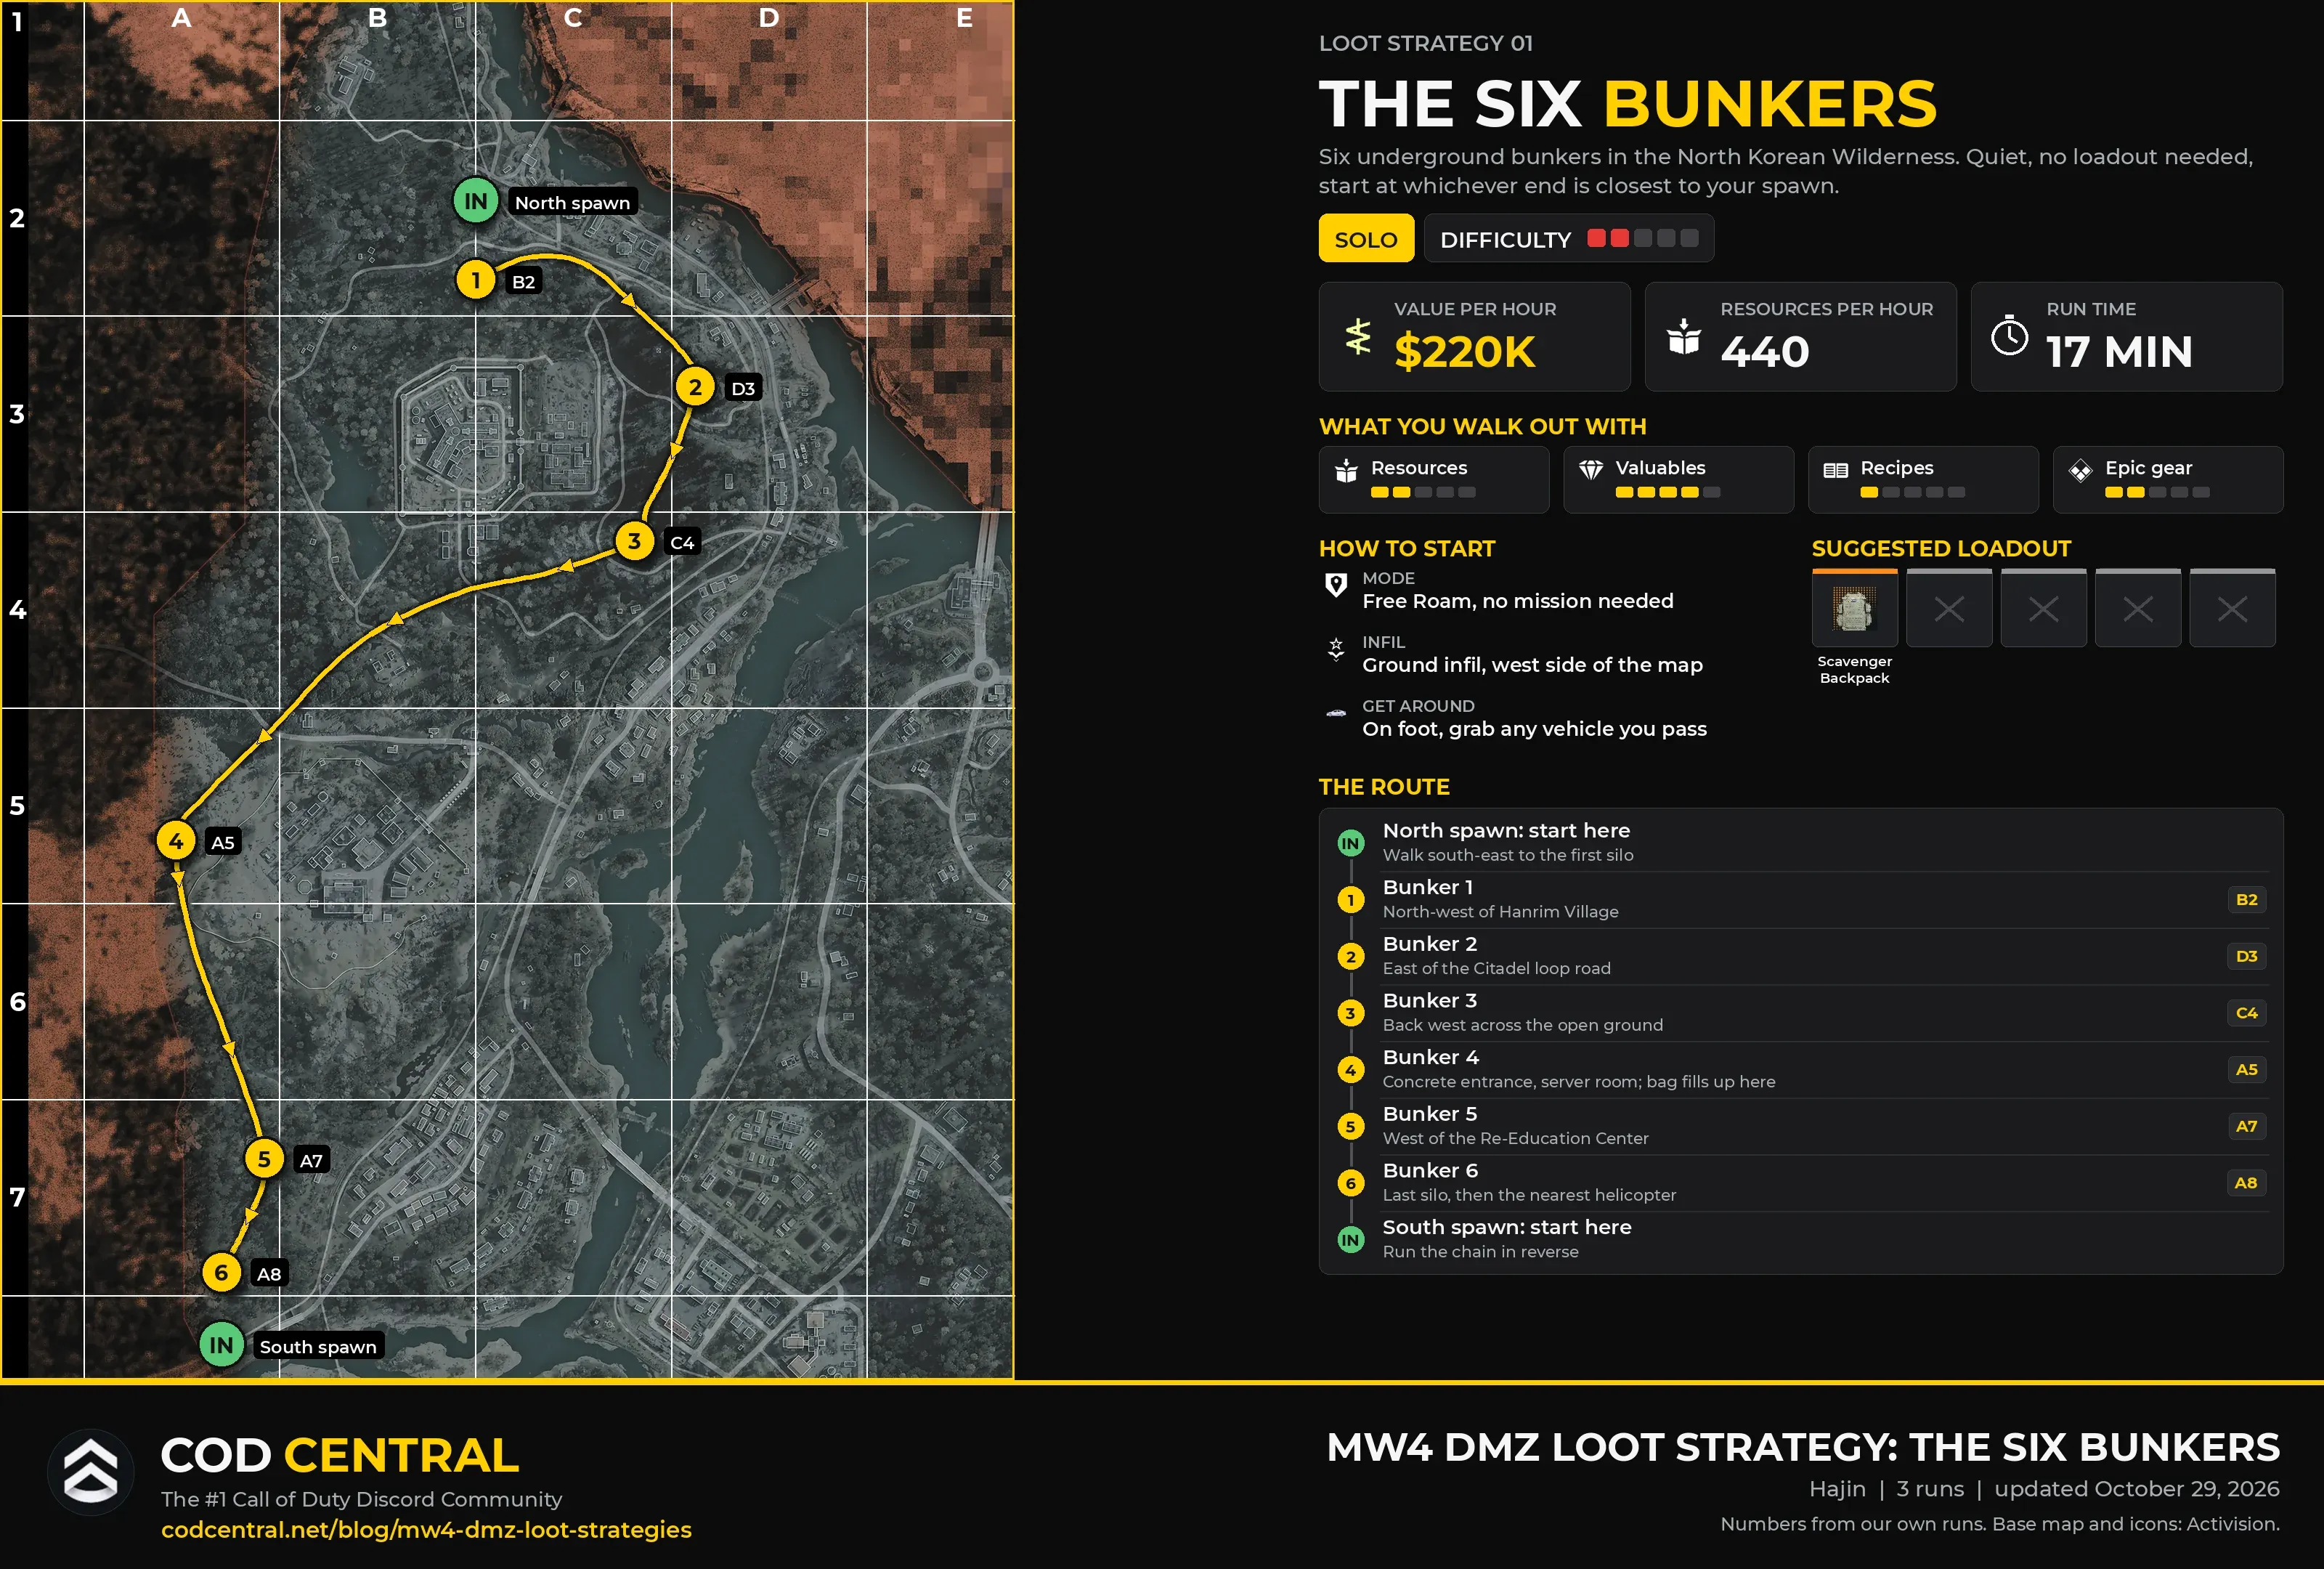
Each bunker has one enemy inside. Take him out quickly, then walk around the bunker to find the door you can unlock; the front door is always locked. Inside you find caches, military bags, rifle cases and a weapons locker. If a door already stands open, the bunker has been looted or someone is still inside. You can go in and take the fight, or skip it and move on to the next one.
| Run | Time | Backpack value | Resources | Cash banked |
|---|---|---|---|---|
| 1 | 15:00 | $65,700 | 105 | $450 |
| 2 | 14:00 | $56,500 | 145 | $5,000 |
| 3 | 16:25 | $62,700 | 126 | $500 |
What you take home is mostly valuables and keys: Sanctioned Assassination Lists, W.M.D. Manifests, program files and keys like the Commandant Office and the Vault Armory. Resources stay modest and banked cash is low, so this is a valuables route, not a cash route. A Large Scavenger Backpack is full after four or five bunkers.
Strategy 2: Iron Citadel
Operation Iron Citadel is the hardest strategy here, and the one that pays the most per run. The mission sends you into Chang-san Air Base: find and upgrade an access card, go down into the bunker, loot The Armory and plant charges on the strike aircraft. The base keeps sending enemies at you the whole time, so you need to stay focused from start to finish.
The reward is worth it. The armory lockers hold Epic and Legendary weapons, recipes and weapon manuals, and if you loot everything on the way you also fill up on resources, often more than 200 chemicals alone. Bring a Large Scavenger Backpack, plenty of ammo and a self-revive. Getting through the armory door and dealing with the Colossus takes either a lot of ammo or Thermite.
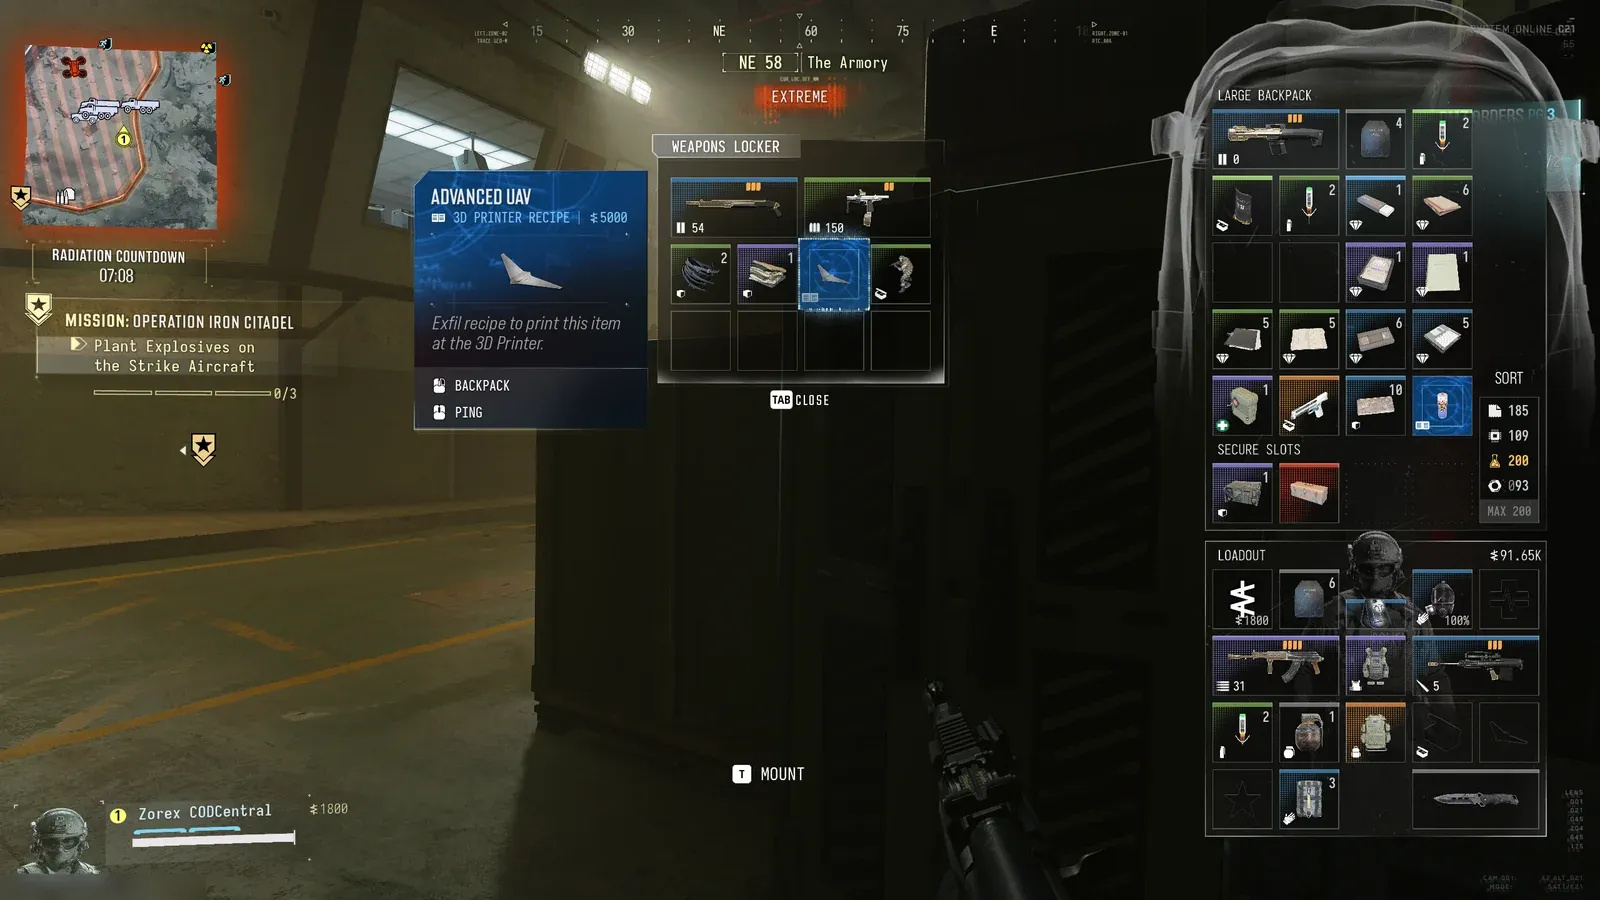
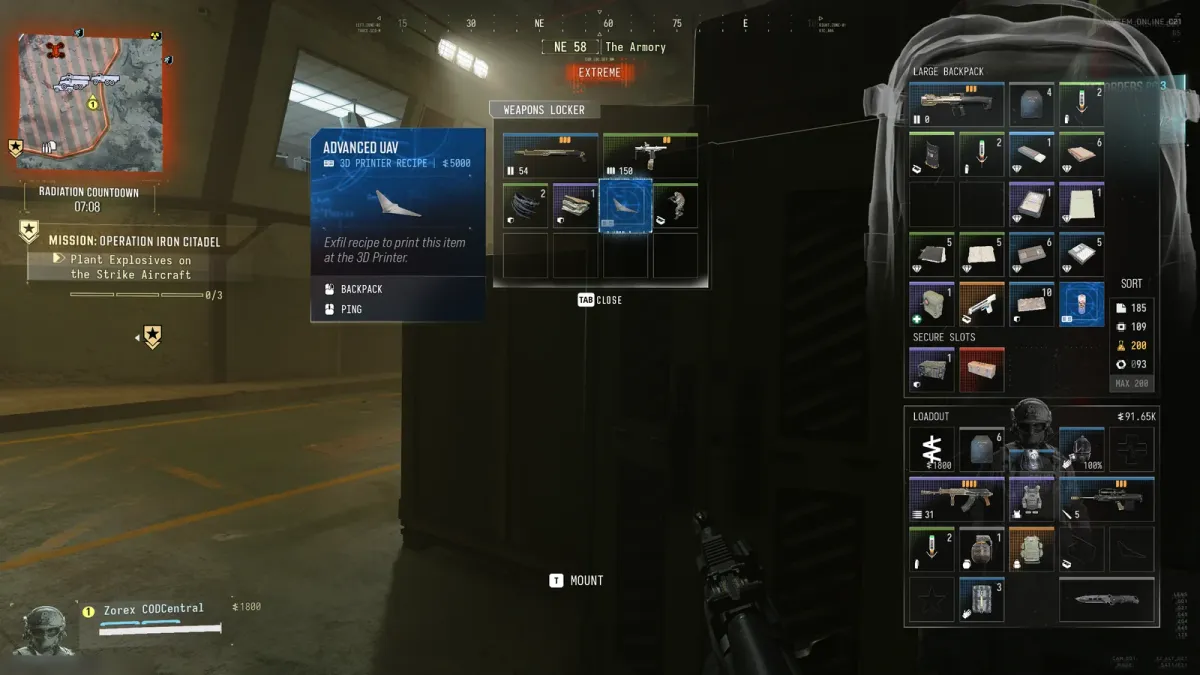 Click to enlarge An armory weapons locker during Iron Citadel. Recipes, weapon manuals and Legendary weapons turn up here.
Before the mission helicopter comes in, you have to capture the SAM site in the north-west corner of the base. The helicopter then lands on the airstrip right next to it, which saves you the trip to an exfil. If the airstrip gets too hot, you don’t have to finish the mission at all: grab a vehicle, drive off and take another exfil. You keep everything you looted.
You can play it solo or in a squad. Solo it takes most of the match. With a squad of three it goes much faster, about 12 minutes for us, but the loot is split three ways, so your own payout is lower.
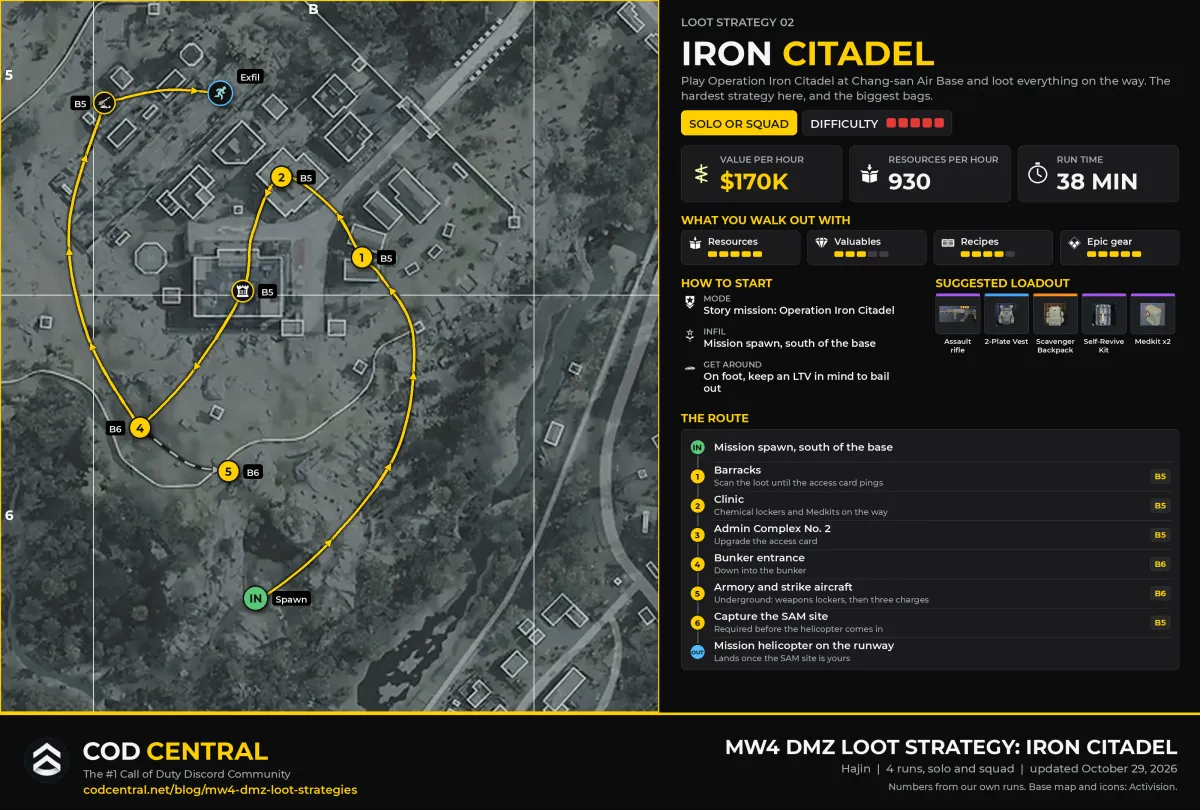 Click to enlarge Iron Citadel: the hardest strategy and the biggest bags. Capture the SAM site before the helicopter lands.
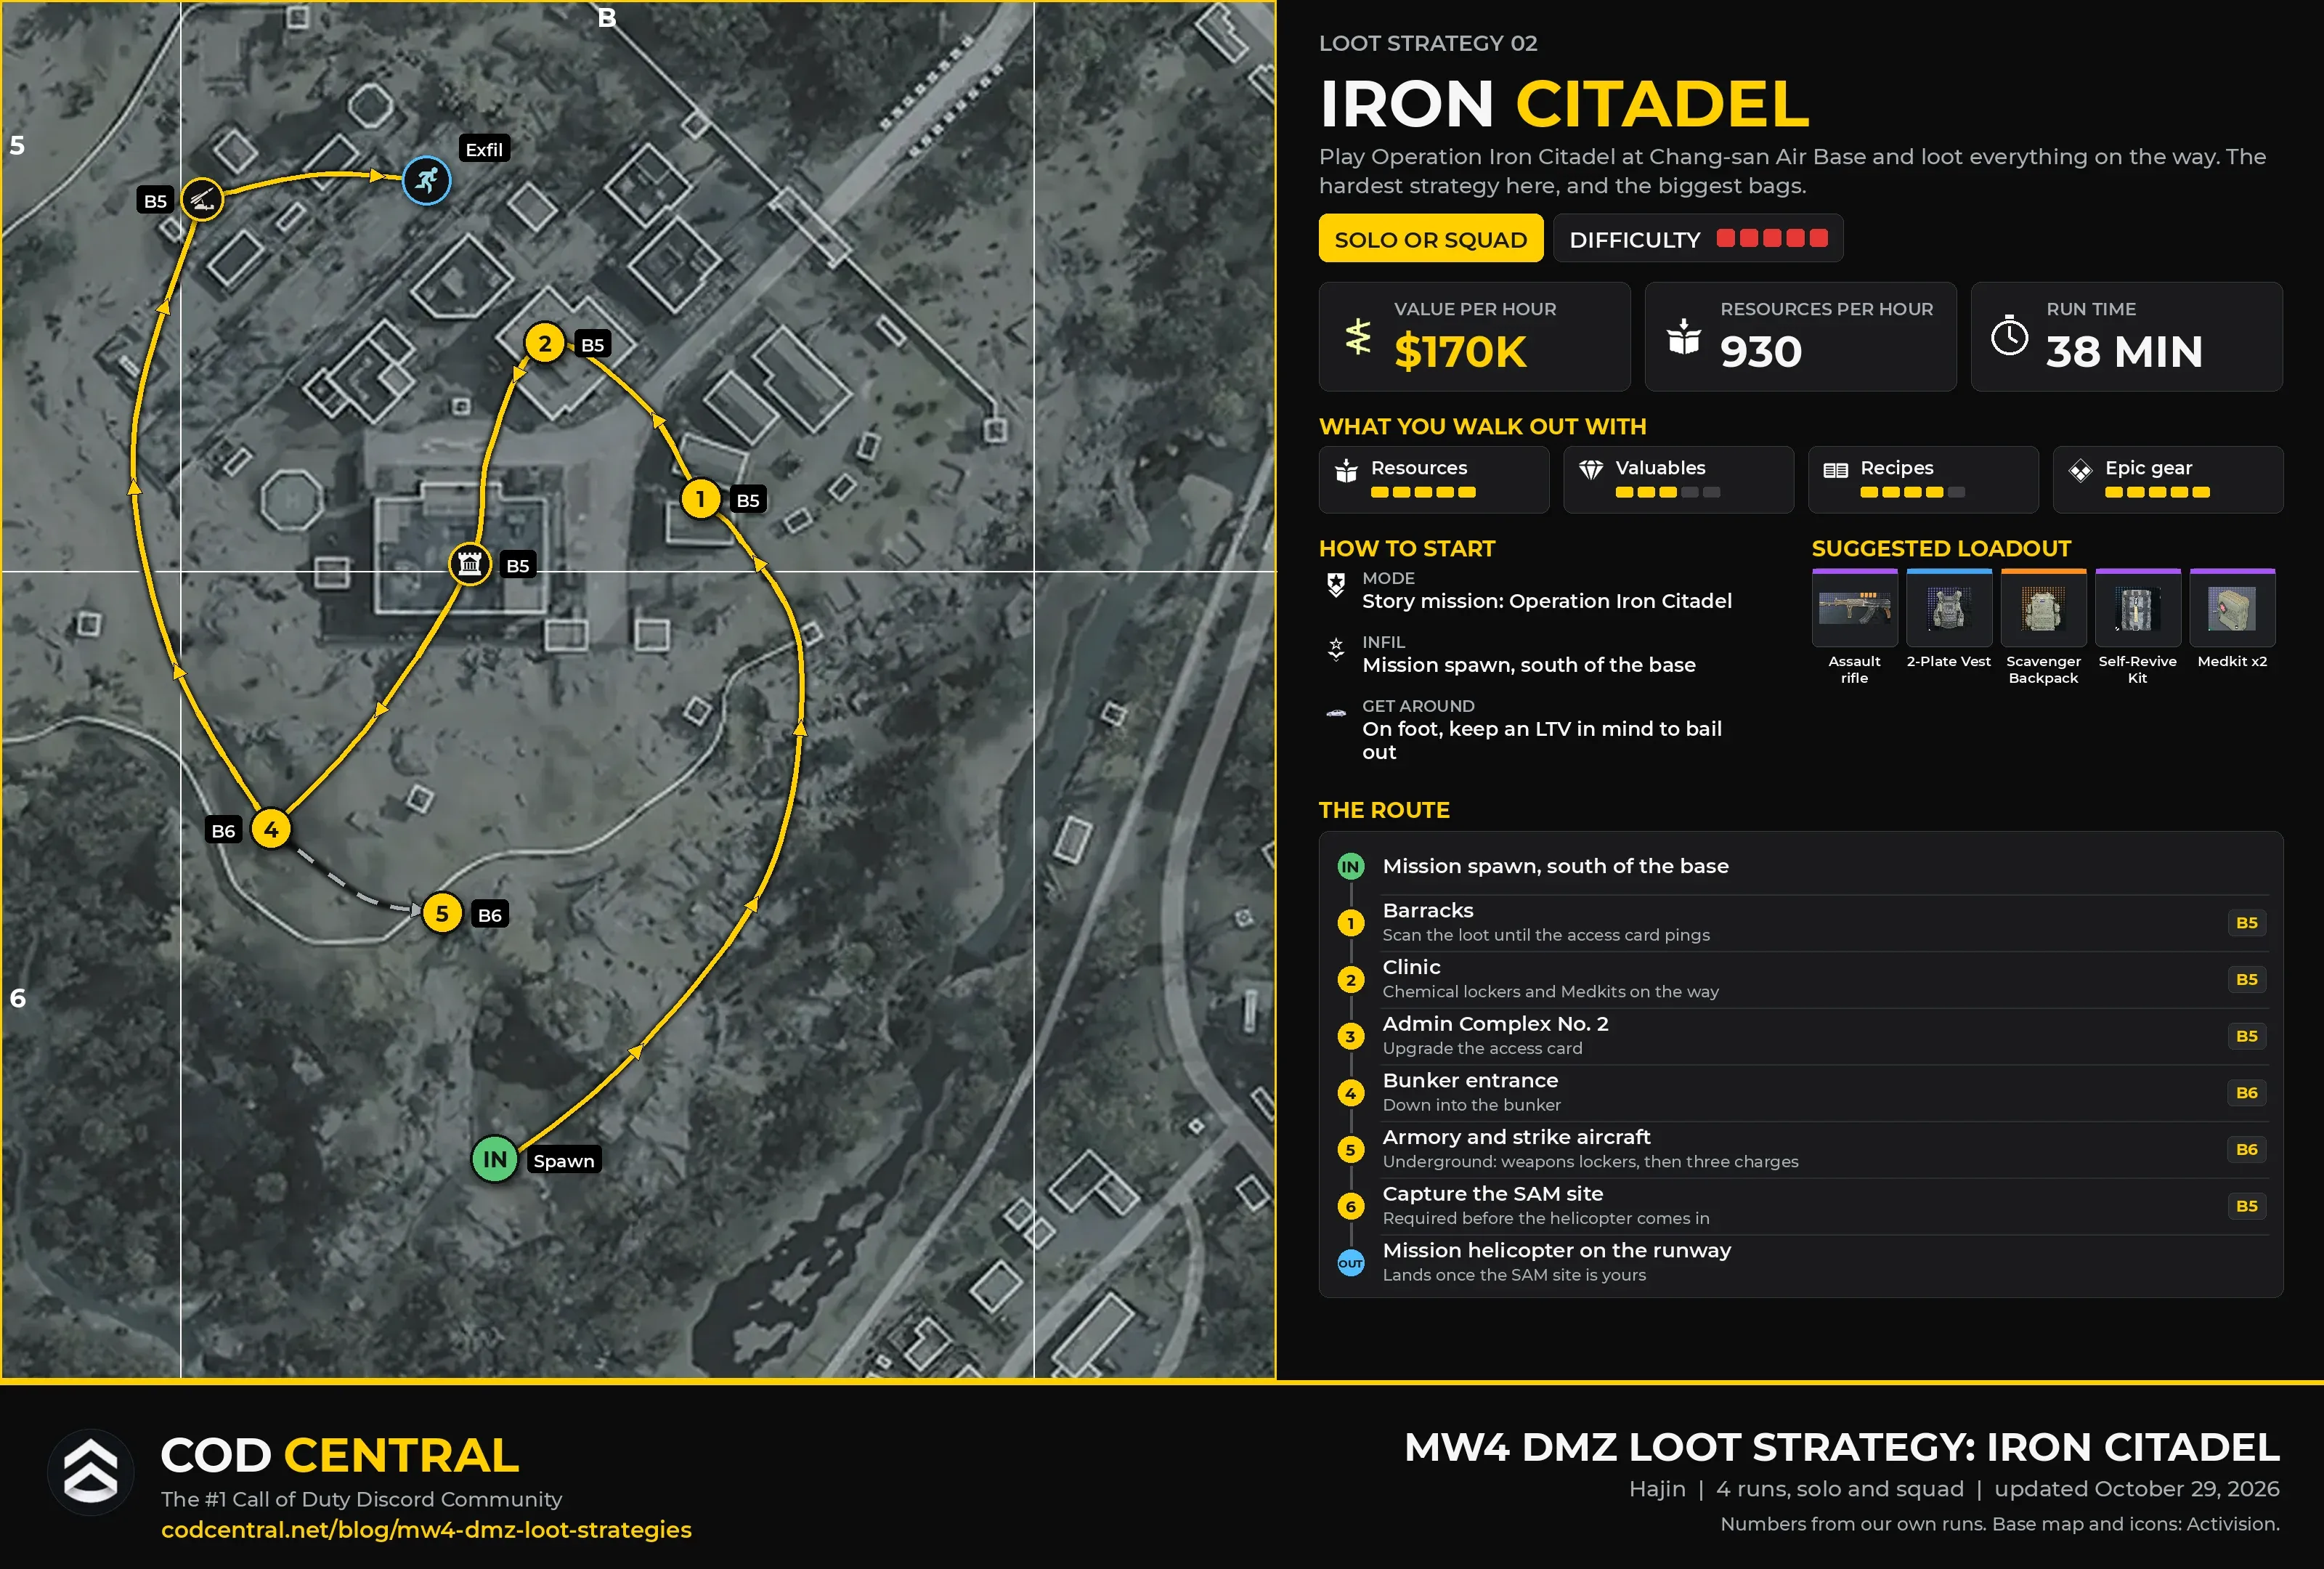
| Run | Squad | Time | Start value | Backpack value | Resources | Cash banked |
|---|---|---|---|---|---|---|
| 1 | Solo | 48:00 | $12,000 | $91,200 | 542 | $11,550 |
| 2 | Solo | 25:40 | $18,600 | $108,500 | 586 | $17,250 |
| 3 | Solo | 48:40 | $20,000 | $125,900 | 642 | $22,800 |
| 4 | Squad of 3 | 12:05 | $33,000 | $84,100 | 197 | $20,550 |
No other strategy comes close on gear and cash per run: three recipes or weapon manuals from the armory are normal, and the banked cash alone is often $15,000 to $20,000. The price is time and risk. Solo you fight through well over a hundred enemies, so play it when you have the full match and your full attention.
Strategy 3: The Safe Run
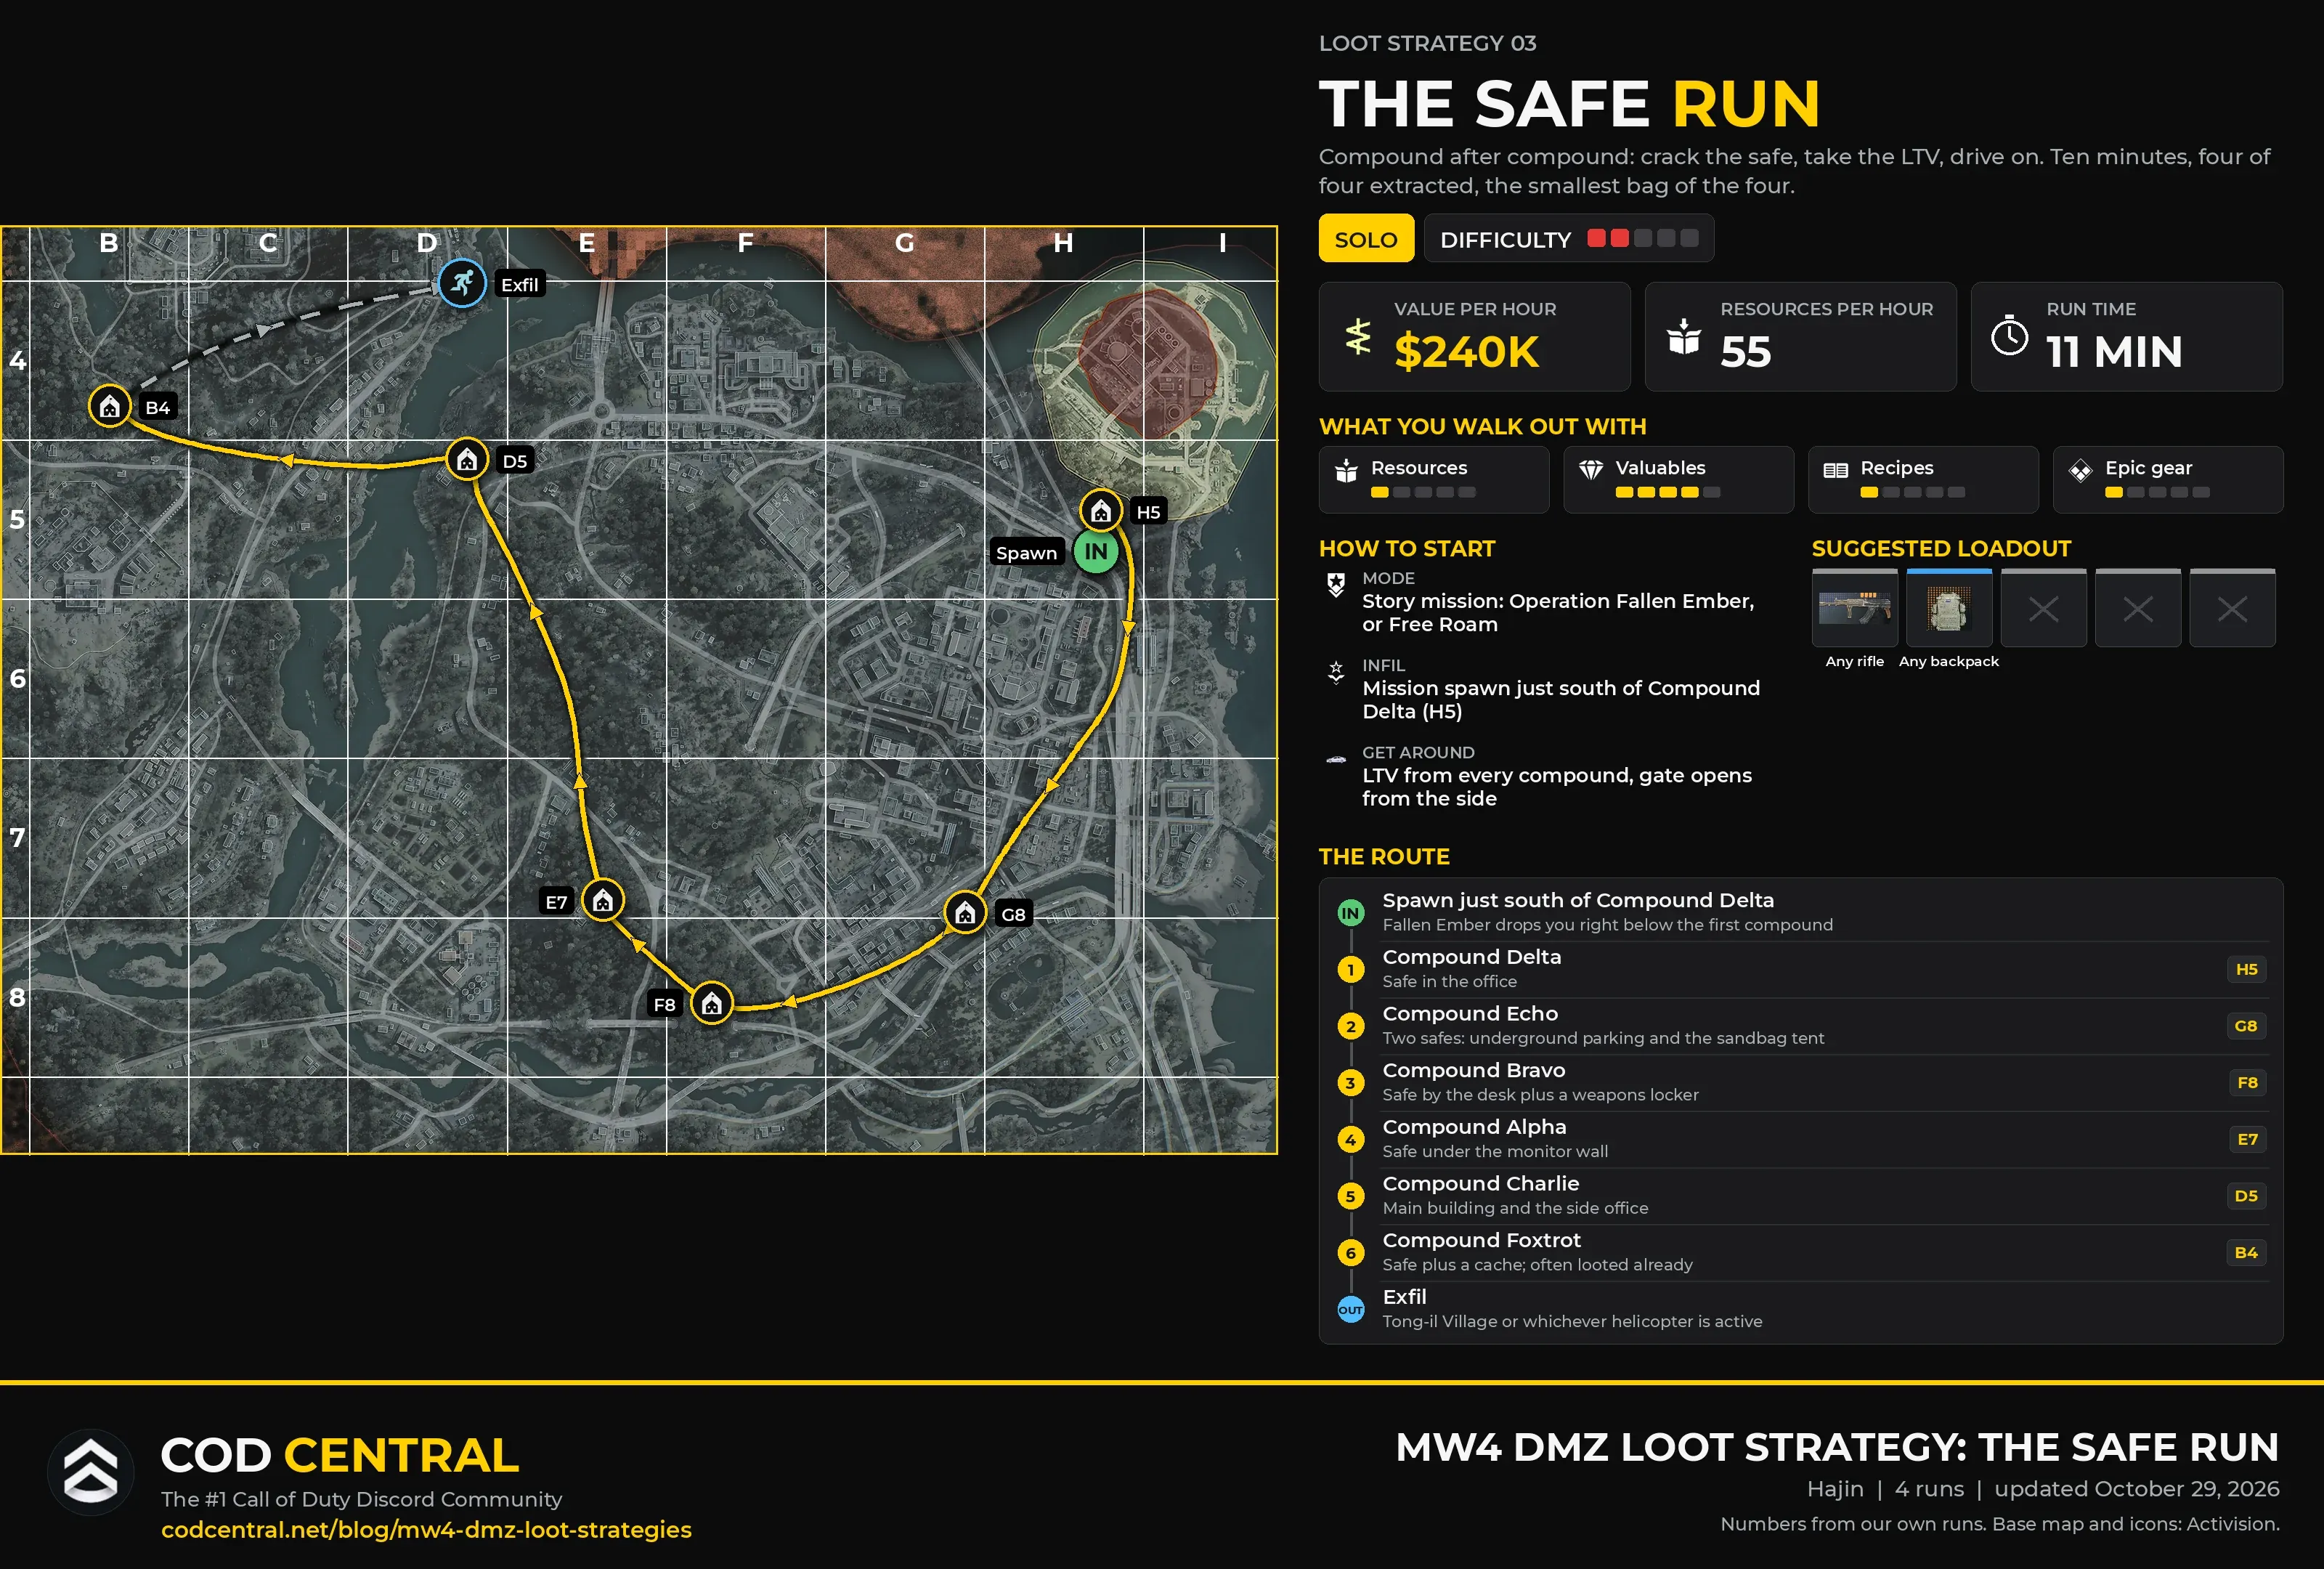
If you just want cash, this is the route. Every military compound on Hajin has a green safe, and the compounds chain into one loop: Delta, Echo, Bravo, Alpha, Charlie and Foxtrot. Operation Fallen Ember drops you right below Compound Delta, and every compound has an LTV waiting, so you crack a safe, jump in the car and drive to the next one. If you’re quick, a full loop takes about ten minutes.
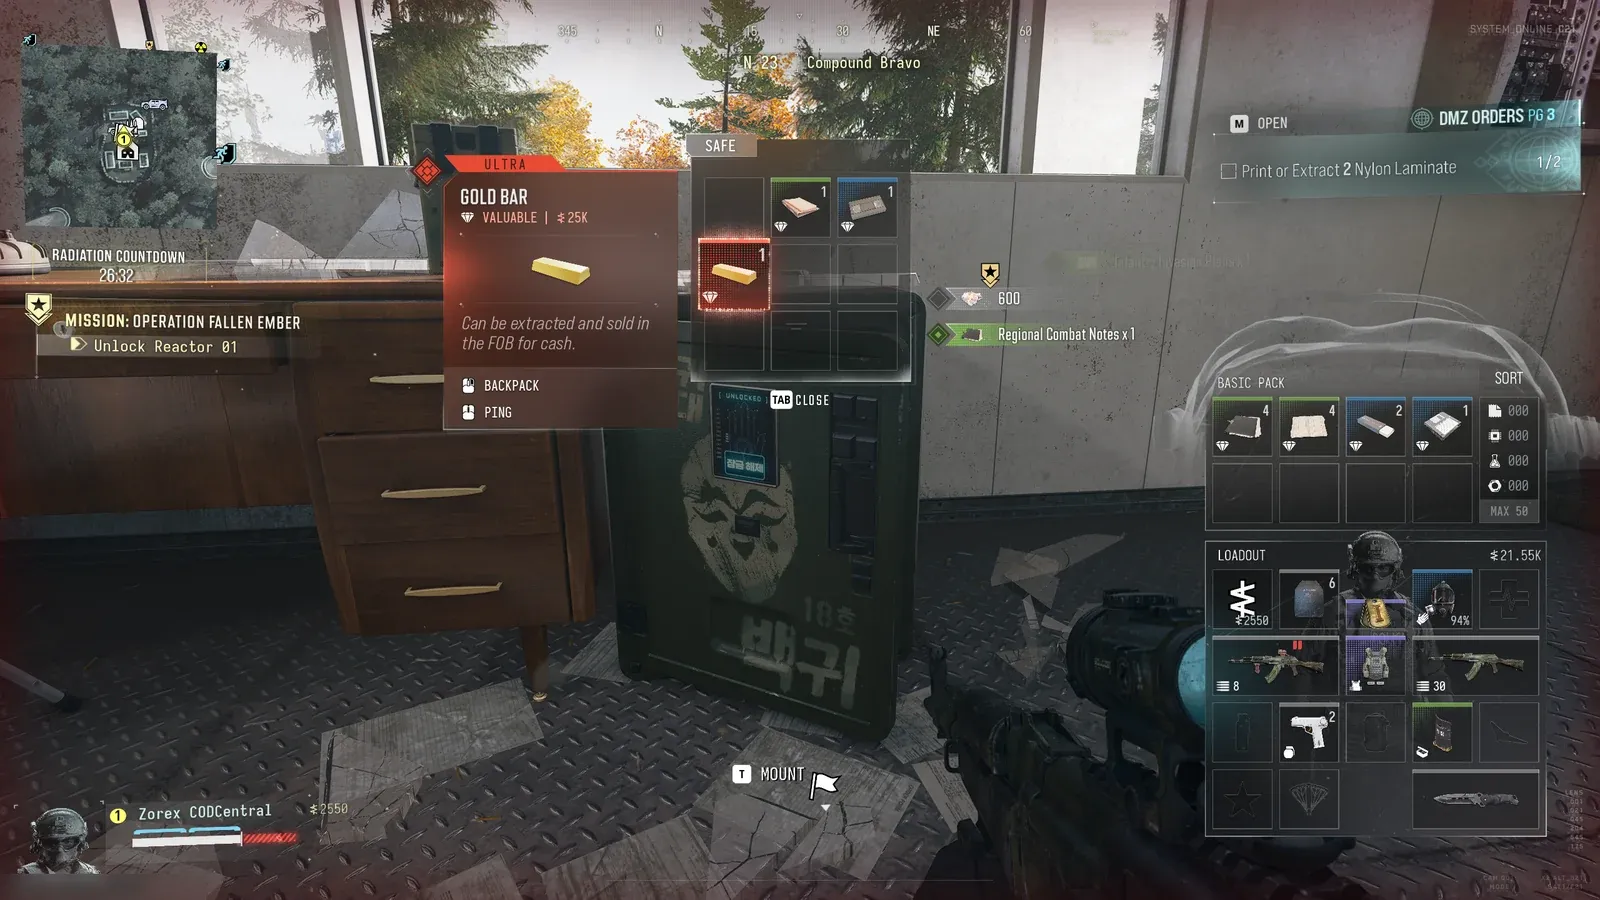
A safe holds a few valuables and some cash. Compound Echo has two safes, one in the underground parking and one in the sandbag tent, so don’t leave after the first. If you’re lucky, a safe drops a Gold Bar or a Gold Skull, worth $25,000 each, and that alone pushes your value per hour way up. What you won’t get here is Epic gear, recipes or resources. This is pure cash, and it is fast.
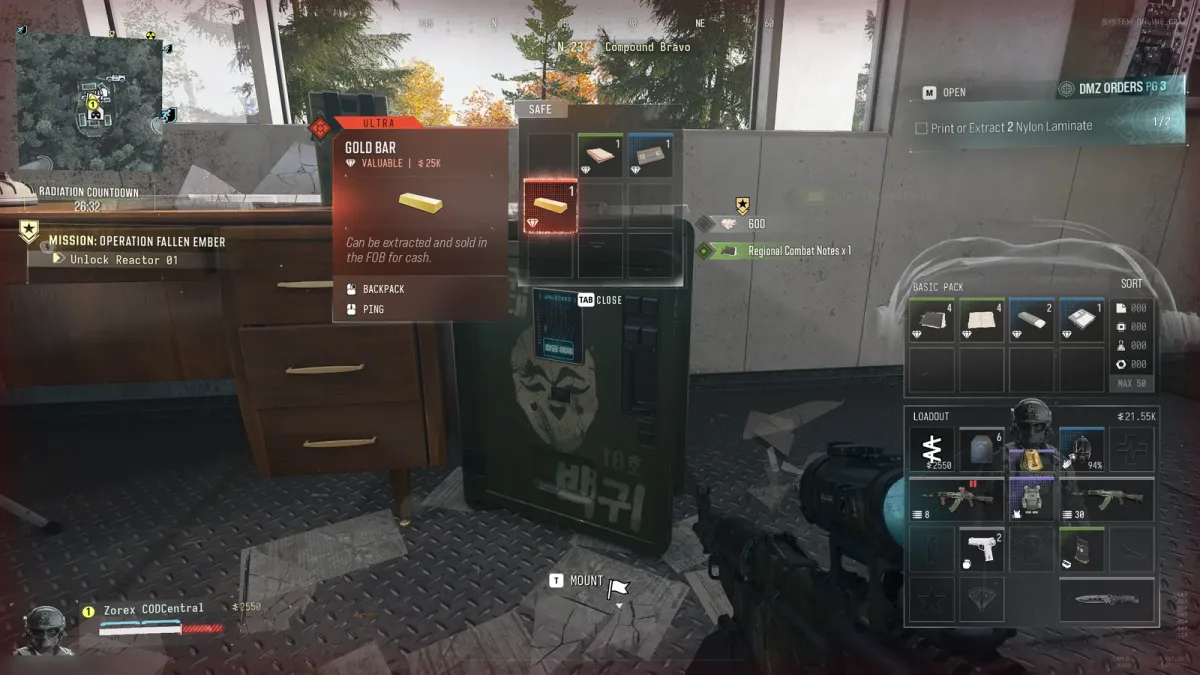 Click to enlarge The jackpot of the safe run: a Gold Bar worth $25,000, here from the safe at Compound Bravo.
Because you spend most of the run inside an armored LTV, there is really only one way to lose it: another squad looting the same compound at the same time. You can drive away, offer a truce through your ping wheel or take the fight, but play it safe, a lost fight costs you the whole run. If a safe already stands open when you arrive, drive straight on to the next compound.
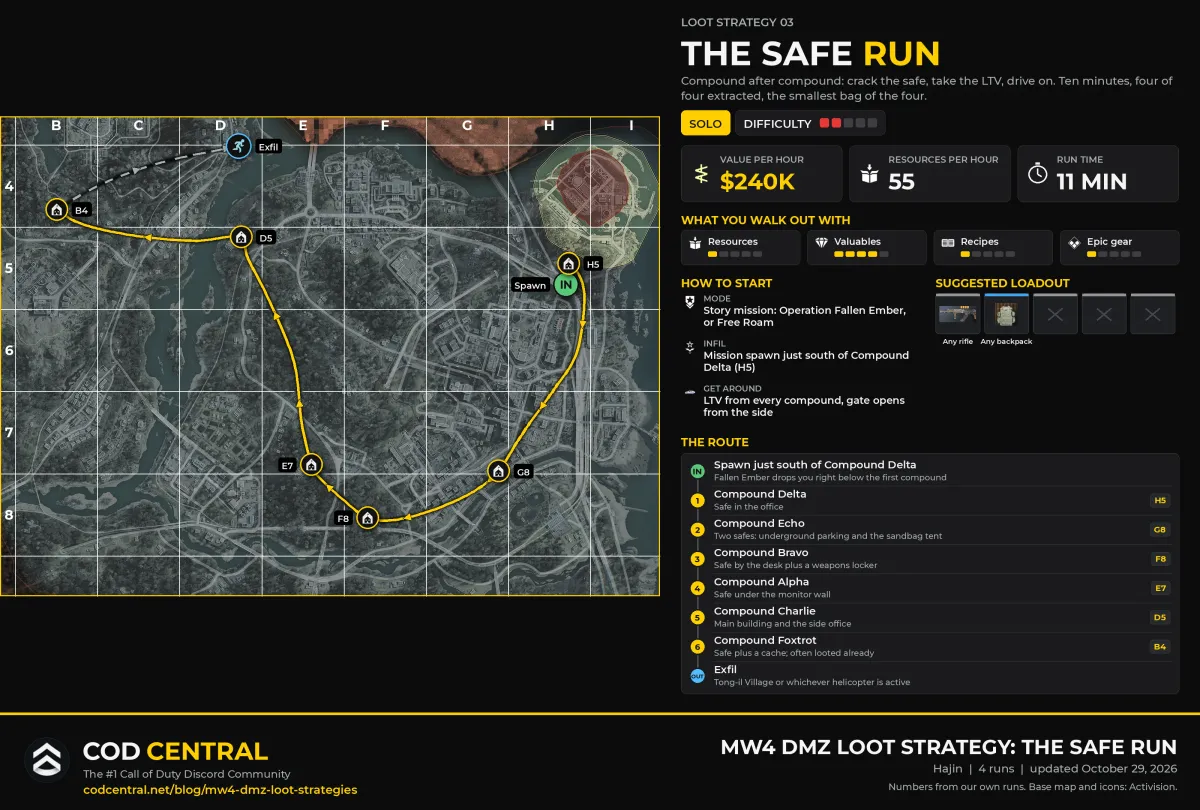 Click to enlarge The safe run: Delta first, then the loop west. Drive past any compound whose safe already stands open.
| Run | Time | Backpack value | Resources | Cash banked |
|---|---|---|---|---|
| 1 | 14:10 | $40,400 | 45 | $1,900 |
| 2 | 10:10 | $30,450 | 0 | $1,850 |
| 3 | 9:35 | $43,050 | 0 | $7,000 |
| 4 | 9:20 | $58,000 | 0 | $3,100 |
Strategy 4: Air Base Sweep
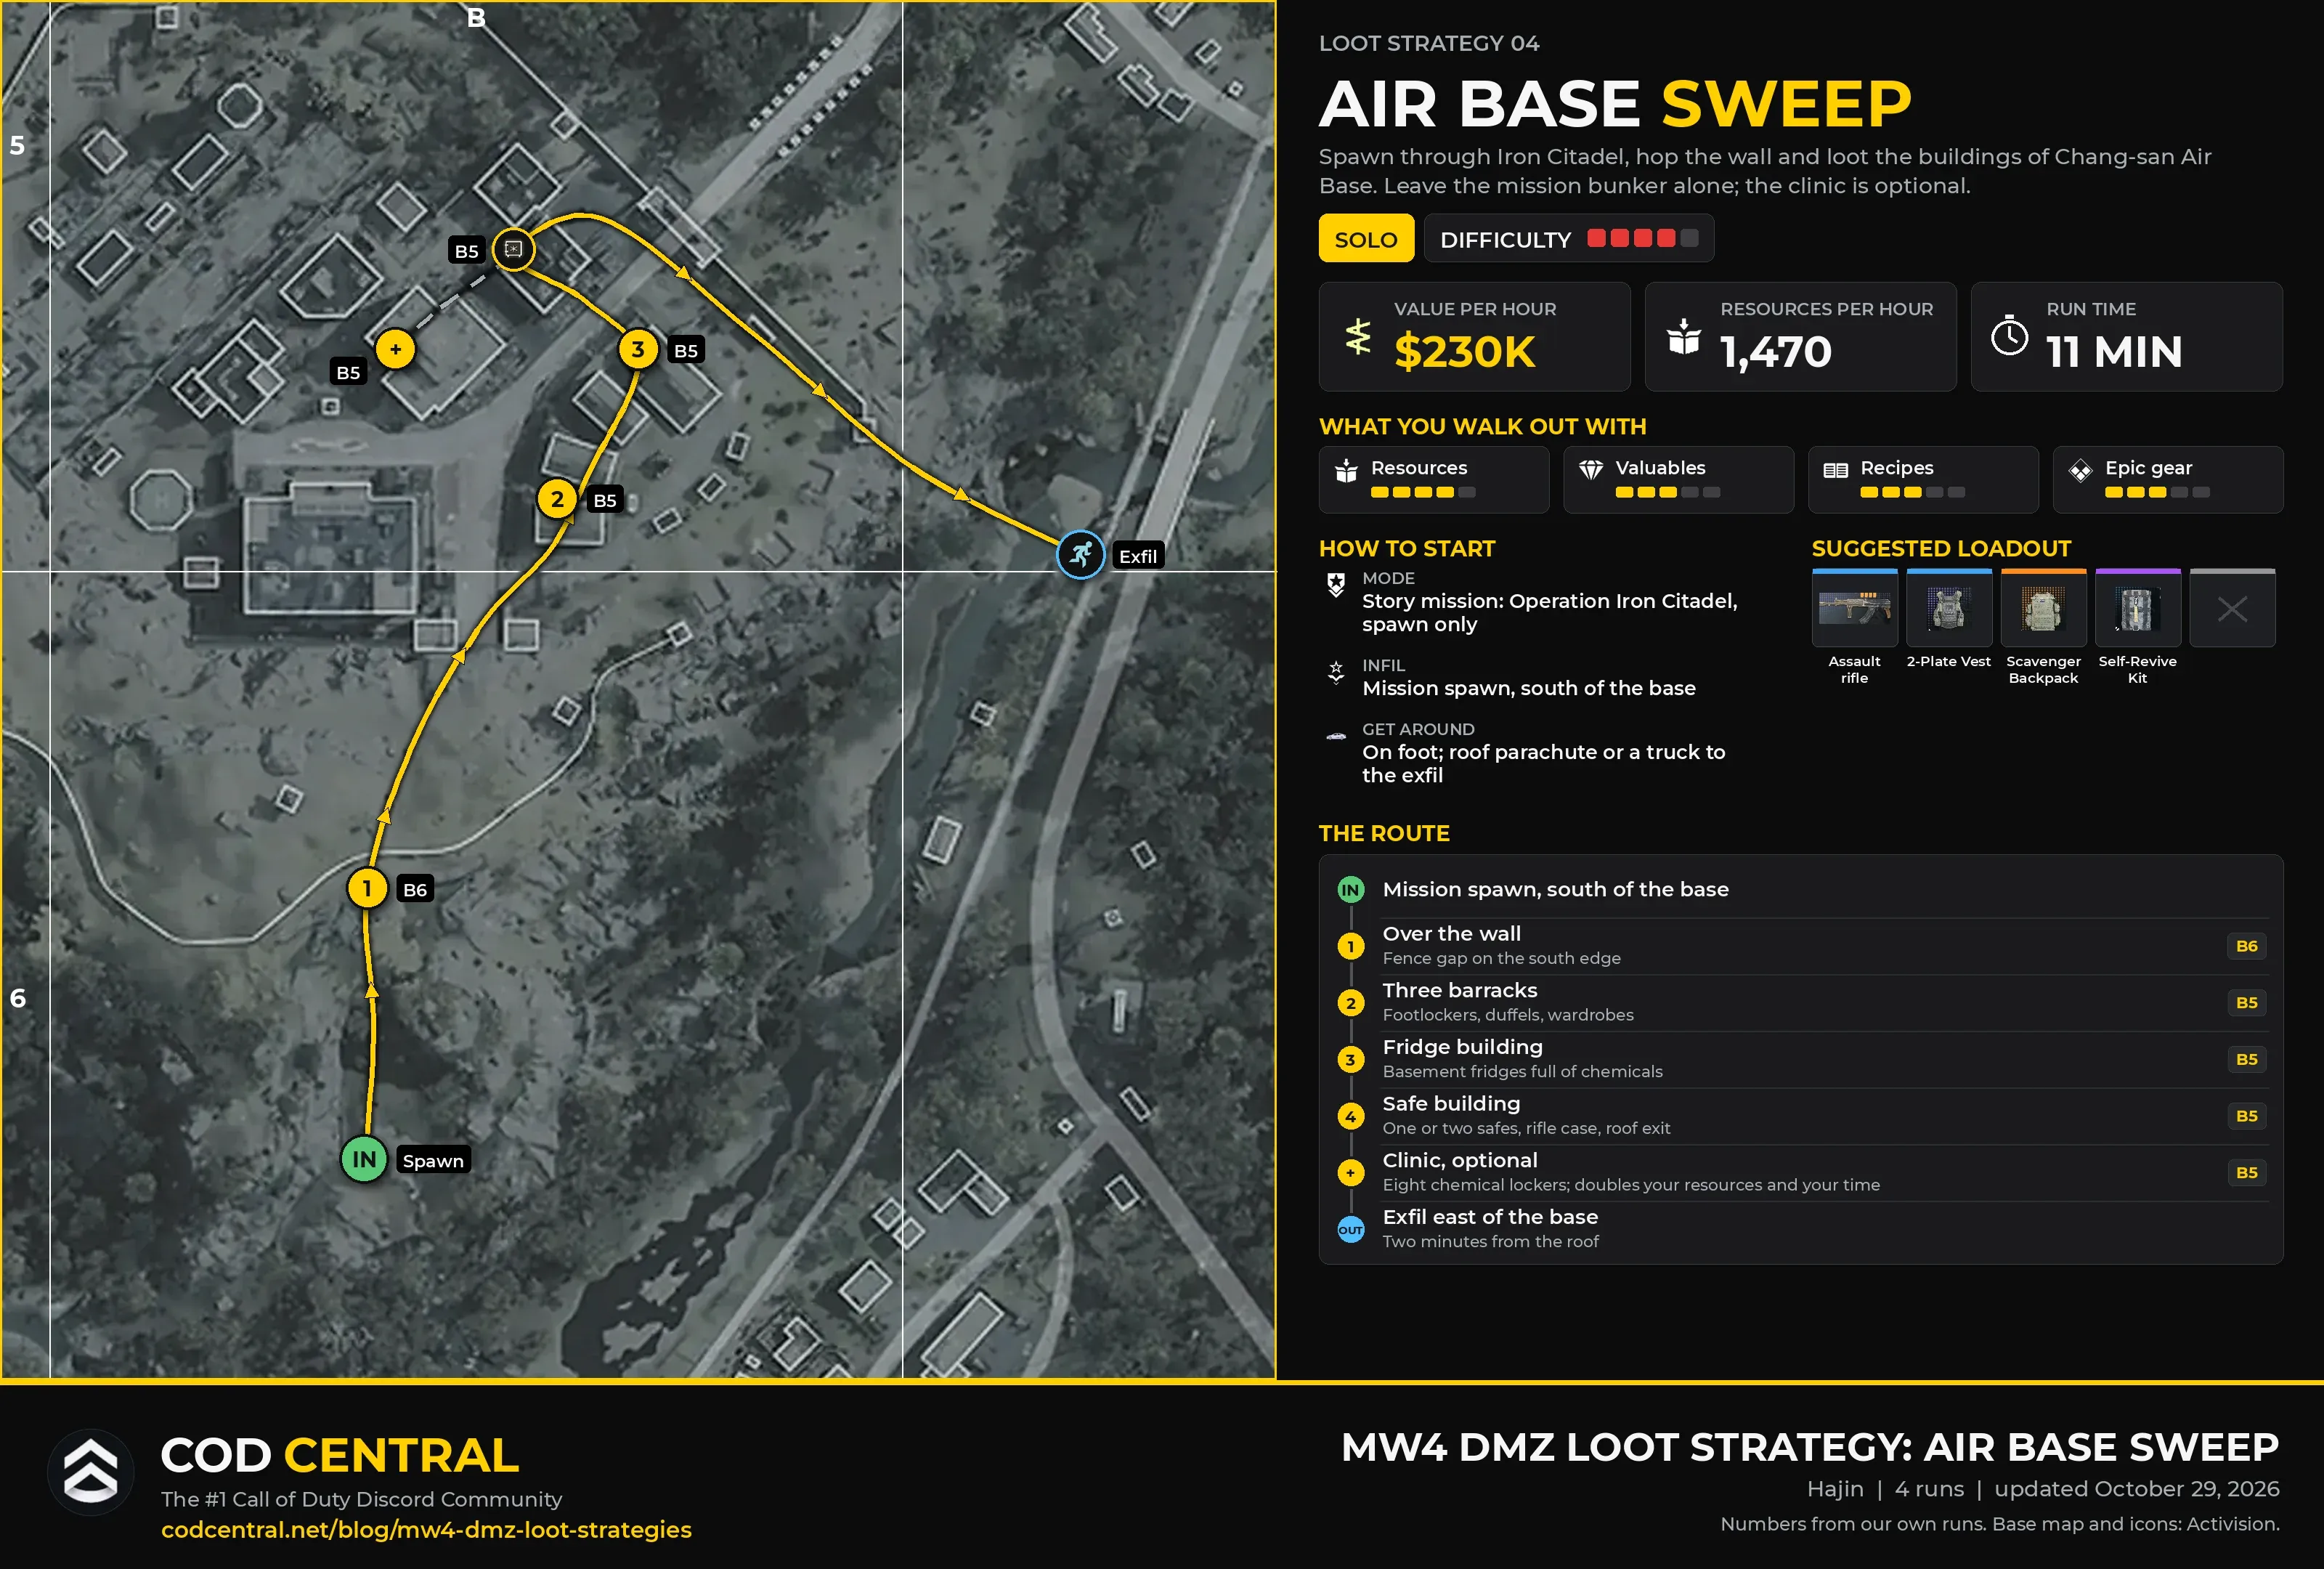
Think of this as Iron Citadel light. You use the mission only for its spawn next to Chang-san Air Base and leave the mission itself alone. Hop the wall, loot the three barracks, the building next to them with its basement fridges, and the safe building on the north edge, then head out. That takes about ten minutes.
If you want resources, add the clinic, the base hospital on the west side. Its chemical lockers are packed with chemicals and other printer resources, and they roughly double what you bring home for about eight extra minutes. Recipes turn up here too, more often in the safe building and the offices than in the barracks.
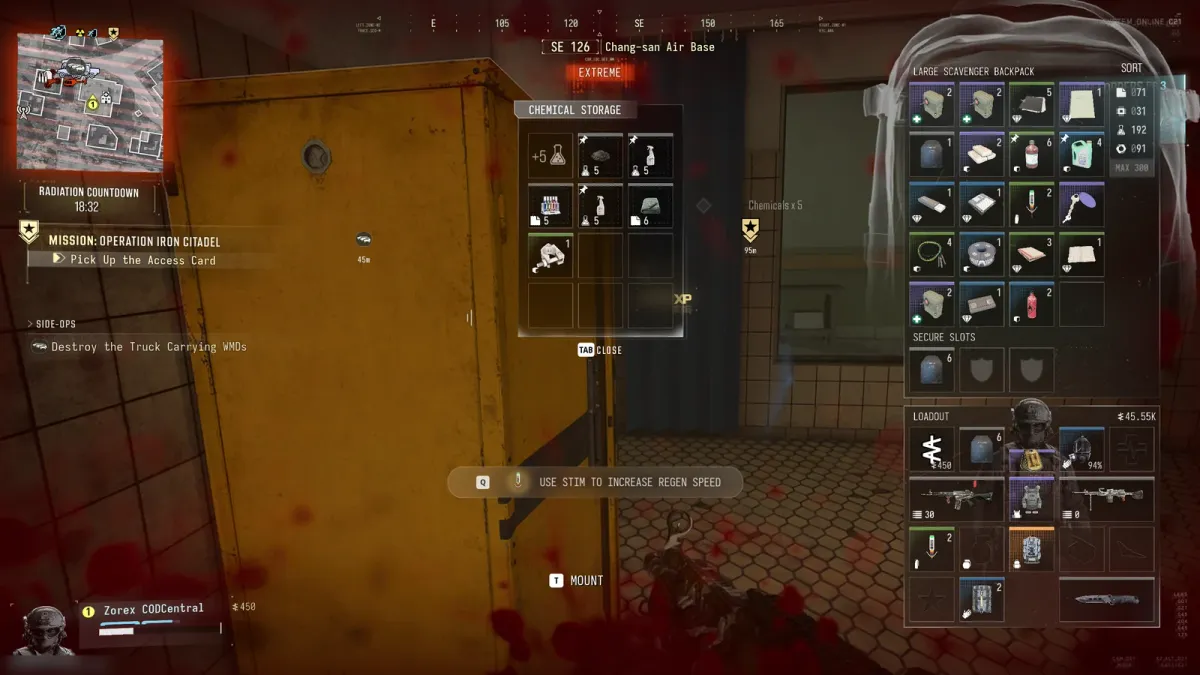 Click to enlarge One of the chemical storage lockers in the air base clinic. This is where the resources come from.
It is fast, like the safe run, but it is not safe. The base is full of enemies, so you’re constantly plating up, shooting back and dodging bullets. It’s hectic, but it pays: lots of resources, solid valuables and often a recipe.
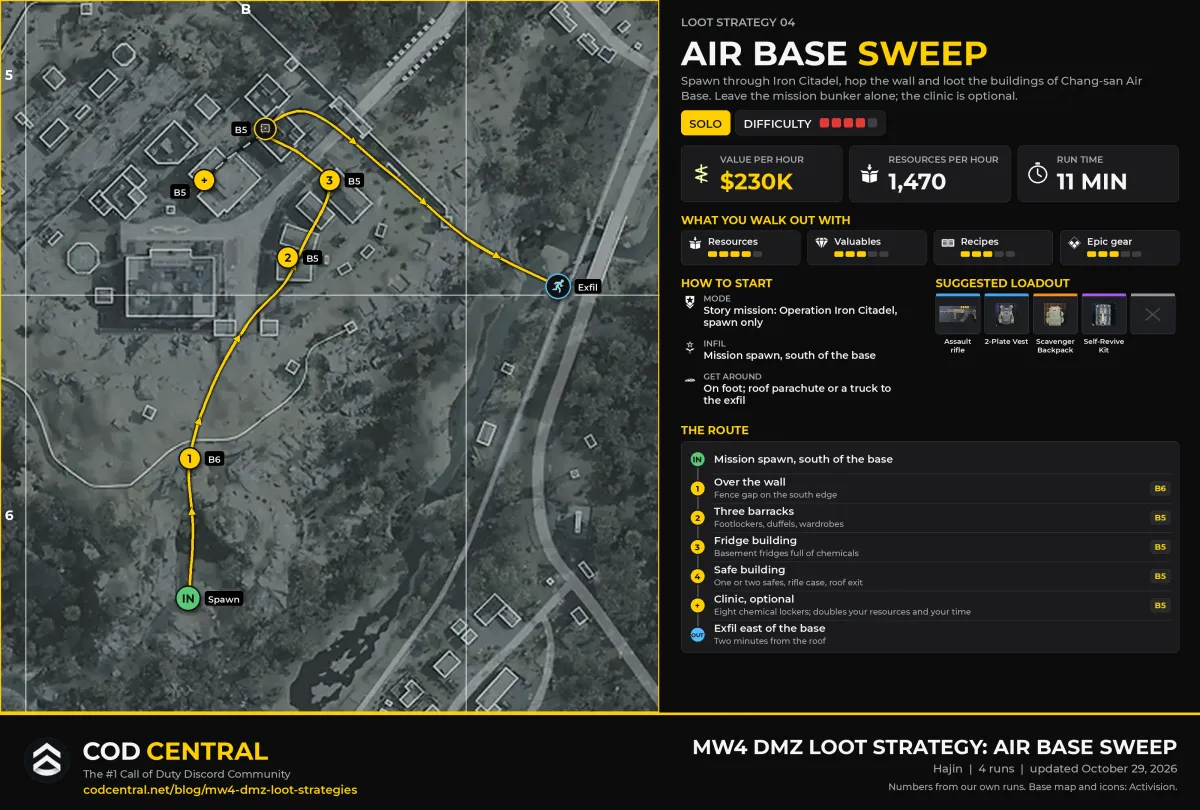 Click to enlarge The air base sweep: the short route as the main line, the clinic as the optional branch for resources.
| Run | Route | Time | Backpack value | Resources | Cash banked |
|---|---|---|---|---|---|
| 1 | With the clinic | 19:55 | $65,700 | 499 | $5,200 |
| 2 | With the clinic | 17:30 | $55,200 | 507 | $1,700 |
| 3 | Short route | 10:25 | $56,250 | 317 | $6,750 |
| 4 | Short route | 10:25 | $46,800 | 217 | $5,850 |
Side by Side
| Six bunkers | Iron Citadel | The safe run | Air base sweep | |
|---|---|---|---|---|
| Value per hour | about $220,000 | about $170,000 | about $240,000 | about $230,000 |
| Resources per hour | about 440 | about 930 | about 55 | about 1,470 |
| Run time | about 17 minutes | about 38 minutes, 12 in a squad | about 11 minutes | about 11 minutes |
| Average backpack value | about $62,000 | about $108,500 | about $43,000 | about $56,000 |
| Difficulty | Easy | Very hard | Easy | Hard |
| Bring | Just a big backpack | Rifle, armor, Scavenger Backpack | Any rifle and backpack | Rifle, armor, Scavenger Backpack |
| Best for | Valuables and keys, no stress | The biggest bag and Epic gear | Fast cash | Printer resources and recipes |
Have questions or a route we should test? Join our COD Central Discord where 50,000+ members hang out.
Frequently Asked Questions
What is the best loot strategy in MW4 DMZ?
It depends on what you want. For cash per hour, the safe run wins at about $240,000 per hour. For printer resources, the air base sweep is best at about 1,470 per hour. For the single biggest bag, Operation Iron Citadel pays over $100,000 per run, but it is by far the hardest. If you just want a relaxed run without much risk, do the six bunkers.
Do I need a loadout to make money in DMZ?
Not for every strategy. The six bunkers and the safe run work with almost nothing, because you barely fight. Iron Citadel and the air base sweep send you into a base full of enemies, so bring a rifle with plenty of ammo, armor, a self-revive and a Large Scavenger Backpack.
How do you measure the value of a DMZ run?
At the end of every run we count everything we brought out: the backpack value, the printer resources and the cash we banked. Every strategy gets at least three runs, and the numbers in this guide are the averages.
What is the best way to farm printer resources in MW4 DMZ?
Chang-san Air Base. The air base sweep gives about 1,470 resources per hour, and adding the clinic brings out around 500 resources in under 20 minutes. The full Iron Citadel mission at the same base gives even more per run, but takes much longer.
Can you do these loot strategies in a squad?
Yes, all four work in a squad. You finish faster, especially Iron Citadel, which took us about 12 minutes with three players, but the loot is split, so each player takes home less.
