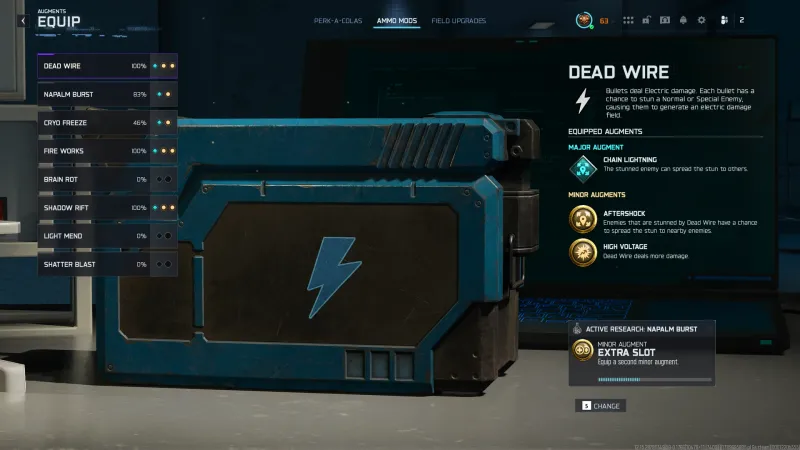
Dead Wire is the only Ammo Mod in BO7 Zombies whose augment research tree opens immediately, which makes it the right one to research first regardless of where you are in your progression. The build that gets the most from it runs Chain Lightning to spread the stun through a packed horde, with High Voltage for extra damage, and Aftershock once Extra Slot opens a second Minor slot.
We tested every Major and Minor across Vandorn Farm Survival runs. Here is what held up and what did not.
- Verdict: Chain Lightning is the Major to run. It turns one Dead Wire proc into a chain reaction that can clear 20 or more zombies from a tight horde. Train them close and keep them moving toward each other while the stun is active.
- Research tree opens immediately: Dead Wire is the only Ammo Mod whose augment research tree is available from the start. Every other mod requires a minimum player level and prior augment unlocks before that tree even opens. Research Dead Wire first.
- Best Minors: High Voltage and Aftershock. High Voltage is a row-one unlock that adds damage to every proc. Aftershock is row three, but pairing it with Chain Lightning produces more spread kills per activation than either one alone.
- Skip: Big Game. Triggering it on elite enemies in our Vandorn Farm runs required shooting the elite directly. When it did connect, the stun lasted around five seconds. Not worth the Major slot in most runs.
- Camping pick: Ball Lightning with Extension and Haste, for holding a position where zombies funnel through a single entrance.
The Best Dead Wire Augment Build
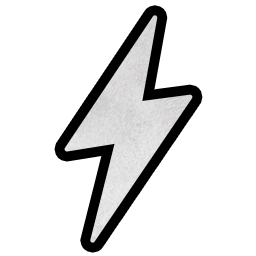
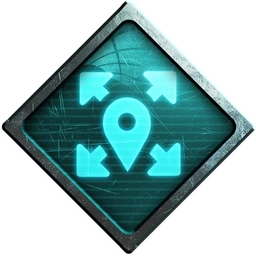
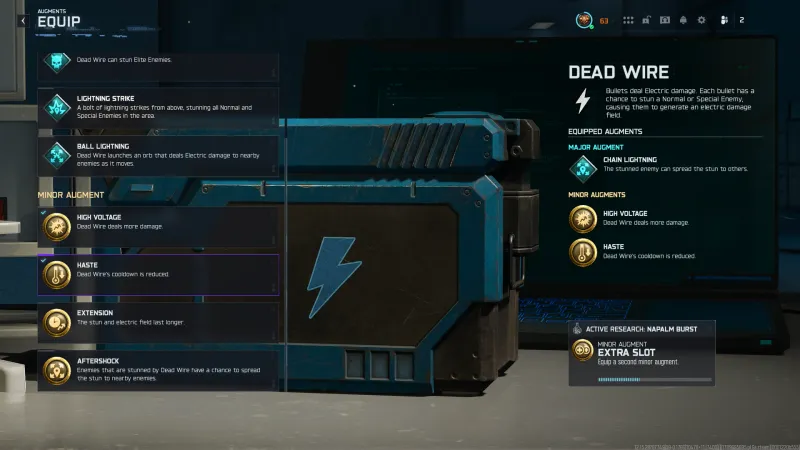
The stunned enemy can spread the stun to others.

Enemies that are stunned by Dead Wire have a chance to spread the stun to nearby enemies.
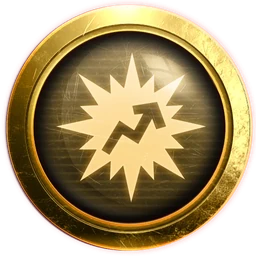
Dead Wire deals more damage.
Aftershock requires Extra Slot, the last node in the research grid. Before you get there, run High Voltage alone. Chain Lightning is a row-one unlock, so you can equip this Major before you are halfway through the research tree.
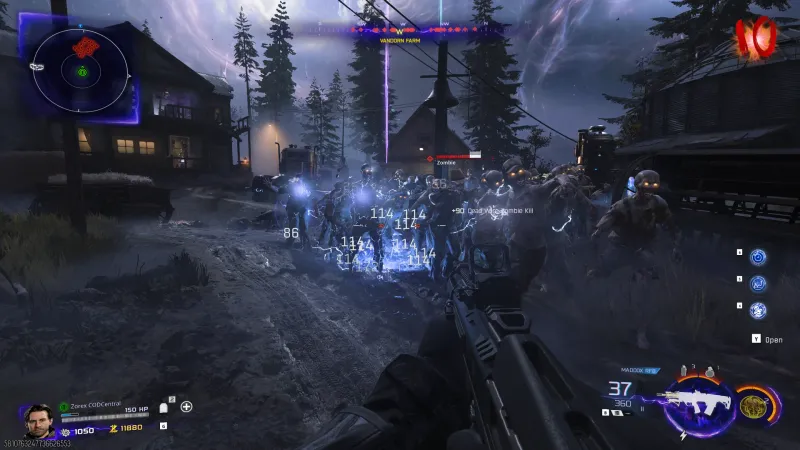
Chain Lightning earns its place because it turns a single Dead Wire activation into a chain reaction across the horde. In our Vandorn Farm runs we saw activations reach 20 eliminations when the horde was packed close. The key is keeping the train together: if zombies spread apart mid-activation the chain breaks. Stay near the group and keep training them while the stun is live.
High Voltage is the first Minor you unlock and it adds extra damage to every proc. Aftershock layers a second spread mechanic on top of Chain Lightning, giving already-stunned zombies a further chance to pass the stun on. Running both produced more spread kills per activation than either one alone in our testing. Because Aftershock sits in row three, you run Chain Lightning and High Voltage as your build until Extra Slot opens.
Best Dead Wire Augments for Camping
Dead Wire launches an orb that deals Electric damage to nearby enemies as it moves.

The stun and electric field last longer.

Dead Wire's cooldown is reduced.
Ball Lightning deployed as a stationary orb in our runs rather than moving freely as described. It works as a barrier at a fixed choke point. This build needs all three rows of the research grid plus Extra Slot before it can be equipped as shown.
In our runs Ball Lightning did not travel far from the activation point. It sat in place as an electric field that damaged and stunned anything walking through it, which is a liability on an open route but an advantage at a doorway. Extension keeps the field active longer per proc, and Haste lets you reset it more often. Both Ball Lightning and Extension are late-grid unlocks, so this build is not available until the full tree is researched.
What Dead Wire Actually Does
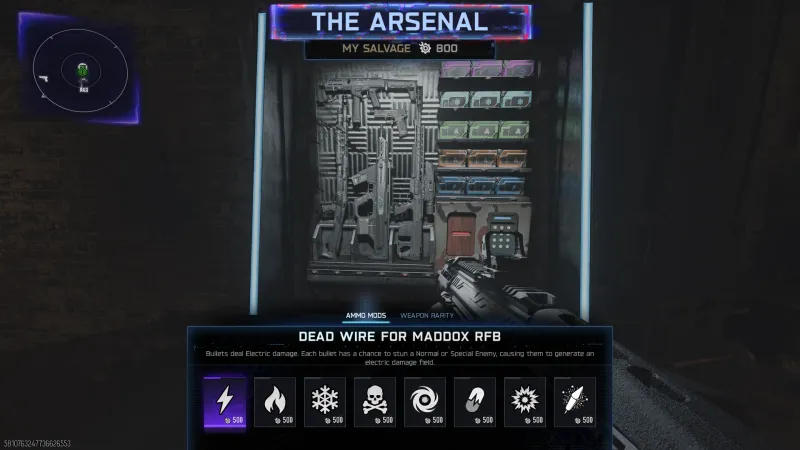
Dead Wire adds Electric damage to every bullet and gives each shot a chance to stun a Normal or Special enemy. When a stun triggers, the shocked enemy generates an electric field that damages nearby enemies for the duration of the stun. Per Treyarch’s launch blog, this is the base behavior with no augments equipped.
Dead Wire’s augment research tree also opens immediately, with no player-level requirement and no prior augments needed before it appears. Every other mod’s research tree is locked until you meet a threshold: Cryo Freeze at level 12 with 6 augments, Fire Works at 18 with 9, Napalm Burst at 35, Shadow Rift at 44, Brain Rot at 51. Dead Wire’s is the only one that opens from the first game you play, which is the practical reason to research it first. Applying the mod to a weapon costs 500 Salvage at an Arsenal Machine, the same price as every other Ammo Mod.
How to Unlock Every Dead Wire Augment
Dead Wire’s research grid runs three rows of three. Row one unlocks first and contains High Voltage (Minor), Chain Lightning (Major), and Haste (Minor). Row two follows with Lightning Strike (Major), Extension (Minor), and Big Game (Major). Row three, the last to unlock, contains Aftershock (Minor), Ball Lightning (Major), and Extra Slot (Minor). A blue diamond marks a Major, a gold circle marks a Minor.
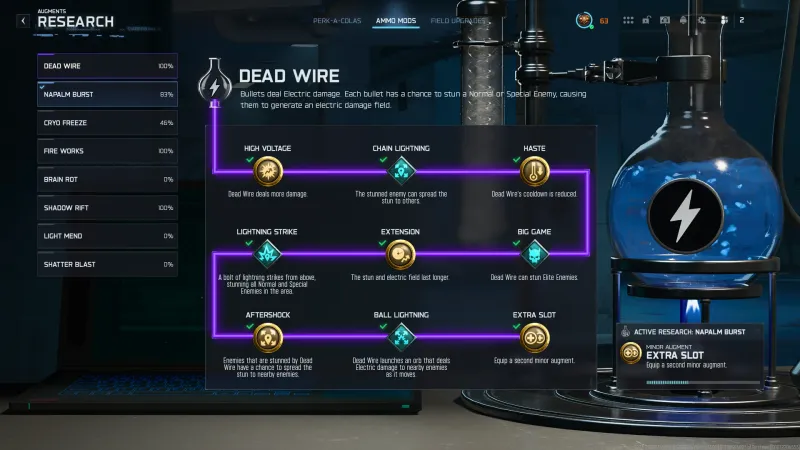
Chain Lightning, our recommended Major, sits in row one. You can equip it from the first augments you research, before reaching the midpoint of the grid. Aftershock, which pairs with it, is in row three alongside Extra Slot, so the full build only comes together once the entire tree is done.
One community dataset from a creator tracking 40-plus matches puts the full unlock cost at around 525,000 XP, or roughly 15 hours at a sustained pace. Dead Wire is new to BO7, so Black Ops 6 research does not carry over and everyone starts at zero.
Is it worth researching first? Yes. Dead Wire opens immediately while every other Ammo Mod has a level gate, and row one alone delivers Chain Lightning. You can move your active research to another project while rows two and three fill in on their own schedule.
All Major Augments for Dead Wire Ranked
Chain Lightning Ball Lightning  Lightning Strike
  Big Game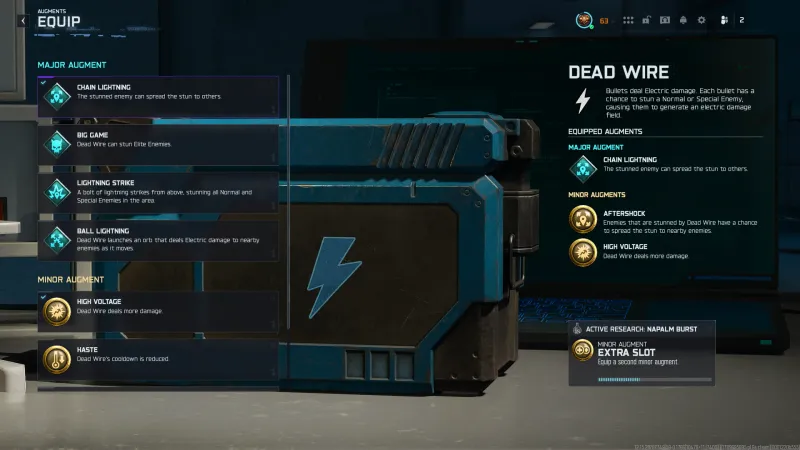
Chain Lightning is the clear pick. It is the only Major that converts a single activation into a chain across the whole horde, and it is available in row one so you do not need to complete the grid before using it. In our Vandorn Farm runs, a tight horde with Chain Lightning active could hit 20 eliminations from one proc.
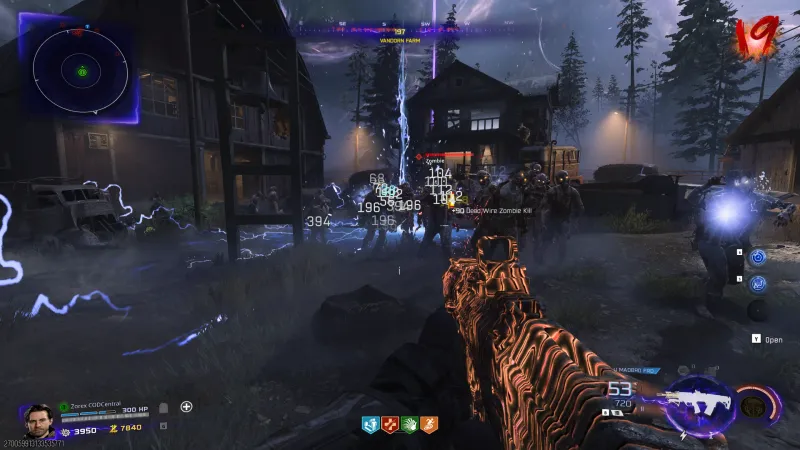
Ball Lightning earns A tier for one specific situation: holding a choke point. In our testing the orb did not travel freely as its description suggests. It sat in place as an electric barrier, which is a liability on an open training route but exactly what you want when every zombie is funneling through a single doorway. On an open map with a running train, it falls apart.
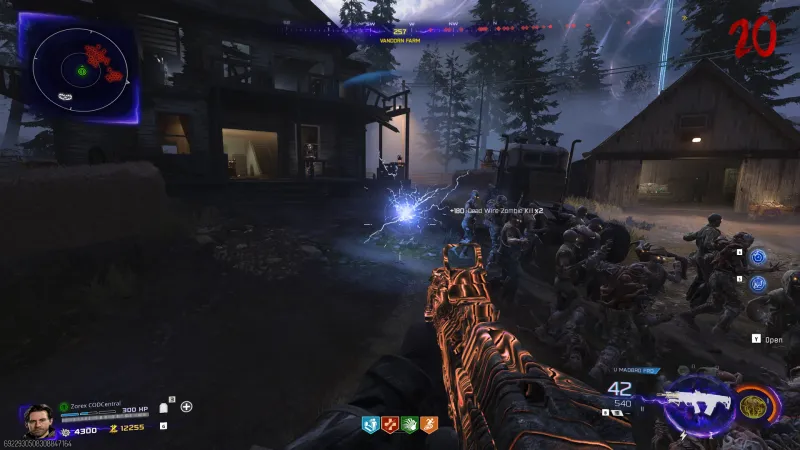
Lightning Strike stuns all normal and special enemies in an area and deals damage equal to roughly 50 percent of their health. The animation is visible from across the map: a bolt drops from the sky wherever the stun triggers. It covers more area per activation than Chain Lightning does, but it relies on a single burst rather than a chain, and it lost its automatic critical-hit bonus at launch. In our Vandorn Farm testing at round 20, Lightning Strike produced two kills from one activation. Chain Lightning on the same round produced significantly more. Lightning Strike earns its slot in situations where you want wide area stun rather than kill count, for instance buying space to revive a teammate or break up a crowd before reloading.
Big Game lets Dead Wire stun elite enemies. We tried to trigger it on Zursa on Vandorn Farm and found it unreliable: the stun only connected when we shot the elite directly rather than by spreading from a nearby zombie. When it did trigger, Zursa was locked in place for around five seconds. That is useful in the moment, but the activation difficulty and the competing Majors make it hard to recommend. The only case for it is when you are specifically farming elites and have no horde to run Chain Lightning through.
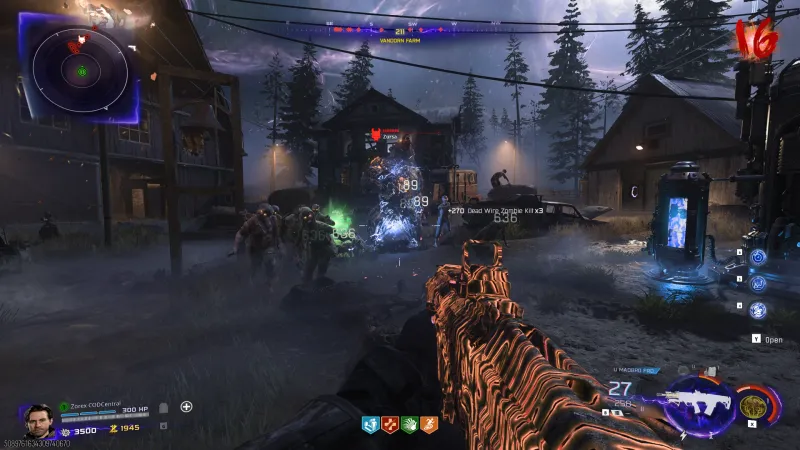
All Minor Augments for Dead Wire Ranked
High Voltage Aftershock Haste Extension High Voltage adds more damage to every activation with no conditions attached. It is the first Minor you unlock and it improves every proc from that point on, which makes it the default pick before any other Minor is available.
Aftershock gives stunned zombies an additional chance to spread the stun to nearby enemies. A Reddit thread with over 200 upvotes asked whether Chain Lightning and Aftershock do the same thing, and did not get a definitive answer. The distinction is where each one acts: Chain Lightning triggers the initial spread from the first shocked zombie, and Aftershock gives already-stunned zombies a separate additional chance to spread it again. Running both with Chain Lightning produced more spread kills per activation in our testing than either one alone. Whether they fully stack proportionally has not been confirmed. Aftershock is a row-three unlock, so it arrives late.
Haste reduces the cooldown between activations, which means more procs per round. The gain is consistent but smaller than the damage and spread improvements from High Voltage and Aftershock. It is the right Minor in the single-slot period before Extra Slot unlocks if Aftershock is not yet available.
Extension keeps the stun and electric field active for longer. It pairs well with Ball Lightning for the camping build, where the field needs to cover a position for as long as possible. One community comparison of High Voltage versus Extension reported that the difference in kill count was hard to measure, so High Voltage is the safer pick whenever you are choosing between the two.
When to Run a Different Ammo Mod
Dead Wire needs a tight horde to pay off. Chain Lightning only chains if zombies are close enough to each other, and Ball Lightning only matters at a fixed position. Spread-out or fast-moving enemies break both mechanics.
For raw kill count at low rounds, Fire Works produces more eliminations per activation and does not require a trained horde. Its Fire Wheel Major keeps dealing damage after the initial proc, which Dead Wire’s chain does not. If your goal is weapon camo progress from ammo-mod kills, community testing on whether Dead Wire kills count toward weapon XP is split, so a mod with a confirmed interaction is a safer pick.
An unlimited Dead Wire glitch exists on Paradox Junction as of the time of writing. We are not covering it here, but its presence means community footage of Dead Wire at high rounds may show inflated performance. It can be patched at any time.
Shadow Rift and Cryo Freeze both stun or displace enemies in a similar way to Dead Wire but with different triggers. Shadow Rift adds a ranged distraction; Cryo Freeze slows movement rather than stopping it. The choice between them is a playstyle call rather than a flat ranking, and switching any of these costs 500 Salvage at the Arsenal each game.
Frequently Asked Questions
Is Dead Wire worth using in BO7 Zombies?
Yes. Dead Wire is the only Ammo Mod available from the start with no unlock gate, and its Chain Lightning build can chain-stun and eliminate a full horde from a single proc. It is less reliable than Fire Works for raw kill count on low rounds but is stronger for crowd control and for locking down specials near the horde.
Does Dead Wire have a player level requirement in BO7?
Dead Wire's augment research tree opens immediately, with no player-level requirement and no prior augments needed. Every other mod's research tree is locked until you hit a threshold: Cryo Freeze requires level 12, Fire Works level 18, and so on. Dead Wire is the only one whose research tree is available from the first game you play.
What happened to Lightning Strike in BO7?
At launch, Treyarch changed Dead Wire so that Lightning Strike no longer counts as an automatic critical hit or headshot. Previously the bolt from above dealt critical-hit damage, which affected XP and camo progress from the activation. The current version reflects that change.
Do Dead Wire kills count toward weapon XP in BO7?
Community testing is split. Some players report that Dead Wire kills do contribute weapon XP, while others running the same mod see no difference. No official confirmation exists, and the results vary too much to give a reliable answer here.
Do Chain Lightning and Aftershock stack with each other?
Their descriptions look similar but they work at different points in the chain. Chain Lightning makes the initial stunned zombie spread the stun to others. Aftershock gives any already-stunned zombie a separate chance to pass the stun on again. In our testing, running both produced more spread kills per activation than either one alone, though whether they fully stack proportionally has not been confirmed.
